
My love affair with chalk paint continues.
I have this antique dresser that I use by my front door to collect mail and it has been in serious need of a makeover. When my grandmother got a hold of it some 50 years ago, it was raw, unfinished wood. She put a coat of poly on it and called it a day. Over the years it has yellowed to a tangerine shade that has no business being in my house. When I inherited it about 7 years ago, I had no time on my hands to refinish it so we just used it as is.

And that big white shelf thing on top? Well, that was just an improvisation from another piece of furniture I received from my sister in law.

And, in case you didn’t notice, the hardware was…

So, in light of the fact that I have zero time or tolerance for prep work and I just really needed a project to get my hands moving again, I chose chalk paint for this revival.
Why chalk style paint? Because it requires little to no prep, it’s pretty much foolproof, cleans up easily, has virtually no odor, and dries very fast. It also leaves a silky, smooth, buttery finish on whatever you slap it on.
Here were my tools, all purchased from my local Walmart:


Kilz Brand Chalk Style Paint in Platinum Ring, Mainstays Shower Liner, and a couple of super-cheap chip brushes. A note on paintbrushes: for some reason, chalk paint applies much better with cheaper brushes. Don’t ask me why. These brushes were 97 cents and $1.23 respectively. The shower liner was also under a dollar. The quart of paint was just under $20, but I only used about 1/4 of the can for the entire project, so I have plenty left over for more projects.
So, here we go! The process was super simple:
- Move dresser away from wall and wipe down.
- Put shower liner under dresser to protect the floor.
- Pull drawers out and set them aside.
- Remove hardware.
- Slap some paint on the dresser.
- Let dry.
- Repeat steps 5 and 6.
Seriously, I slopped the paint on, let it dry, slopped another coat on and was done. Start to finish took about 3 hours, but that includes some drying time and time to deal with the hardware. And I think it turned out pretty great…

I also painted the white shelf thing because I knew I’d be using it and I wanted the whole piece to have a cohesive look. I can always take it off later.
And, as for the hardware, I tried cleaning it up but that didn’t work out as well as I’d hoped, so I opted to spray it with some “chrome” metallic paint I had hanging out in my basement.
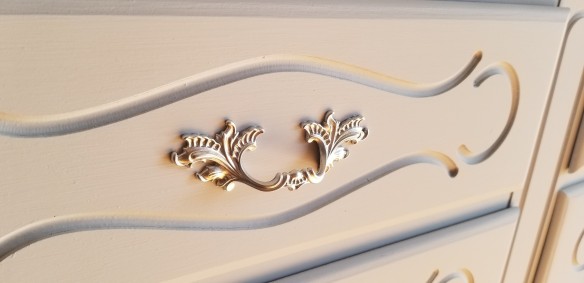
They didn’t turn out quite as “chromy” as I was thinking, but I really like the finish anyway. It’s almost like a soft, brushed chrome.
That’s going to be a thing now. Soft Chrome. You heard it here first!
And so, the moral of the story is: chalk paint is fantastic. I didn’t sand or prep anything. All the nicks and scratches are virtually gone and the finish is buttery soft. This lovely shade of gray has a blue undertone and works really well with the other sand and blue tones in the room.
Here it is all prettied up:

I’ll definitely be chalk-painting again!
