Chalk Paint-a-Palooza

Well, apparently spring is here in the Northeast but I’d be hard pressed to prove it to anyone if I had to rely on the current weather for evidence.  Still cold.  Rainy today.  Bleh.

But, on the upside, with all that wintry weather that we’ve had over the past few weeks, I’ve been able to churn out a handful of fun, small chalk paint projects.  Nothing particularly spectacular here, but if you stay tuned, I’m working on something fairly spectacular that will feature chalk paint, old pallets, random fence panels, scrap wood, and a handful of shower curtains that I’m not currently using.  Intrigued?  You should be.

In the meantime, first up:

20190222_162732.jpg

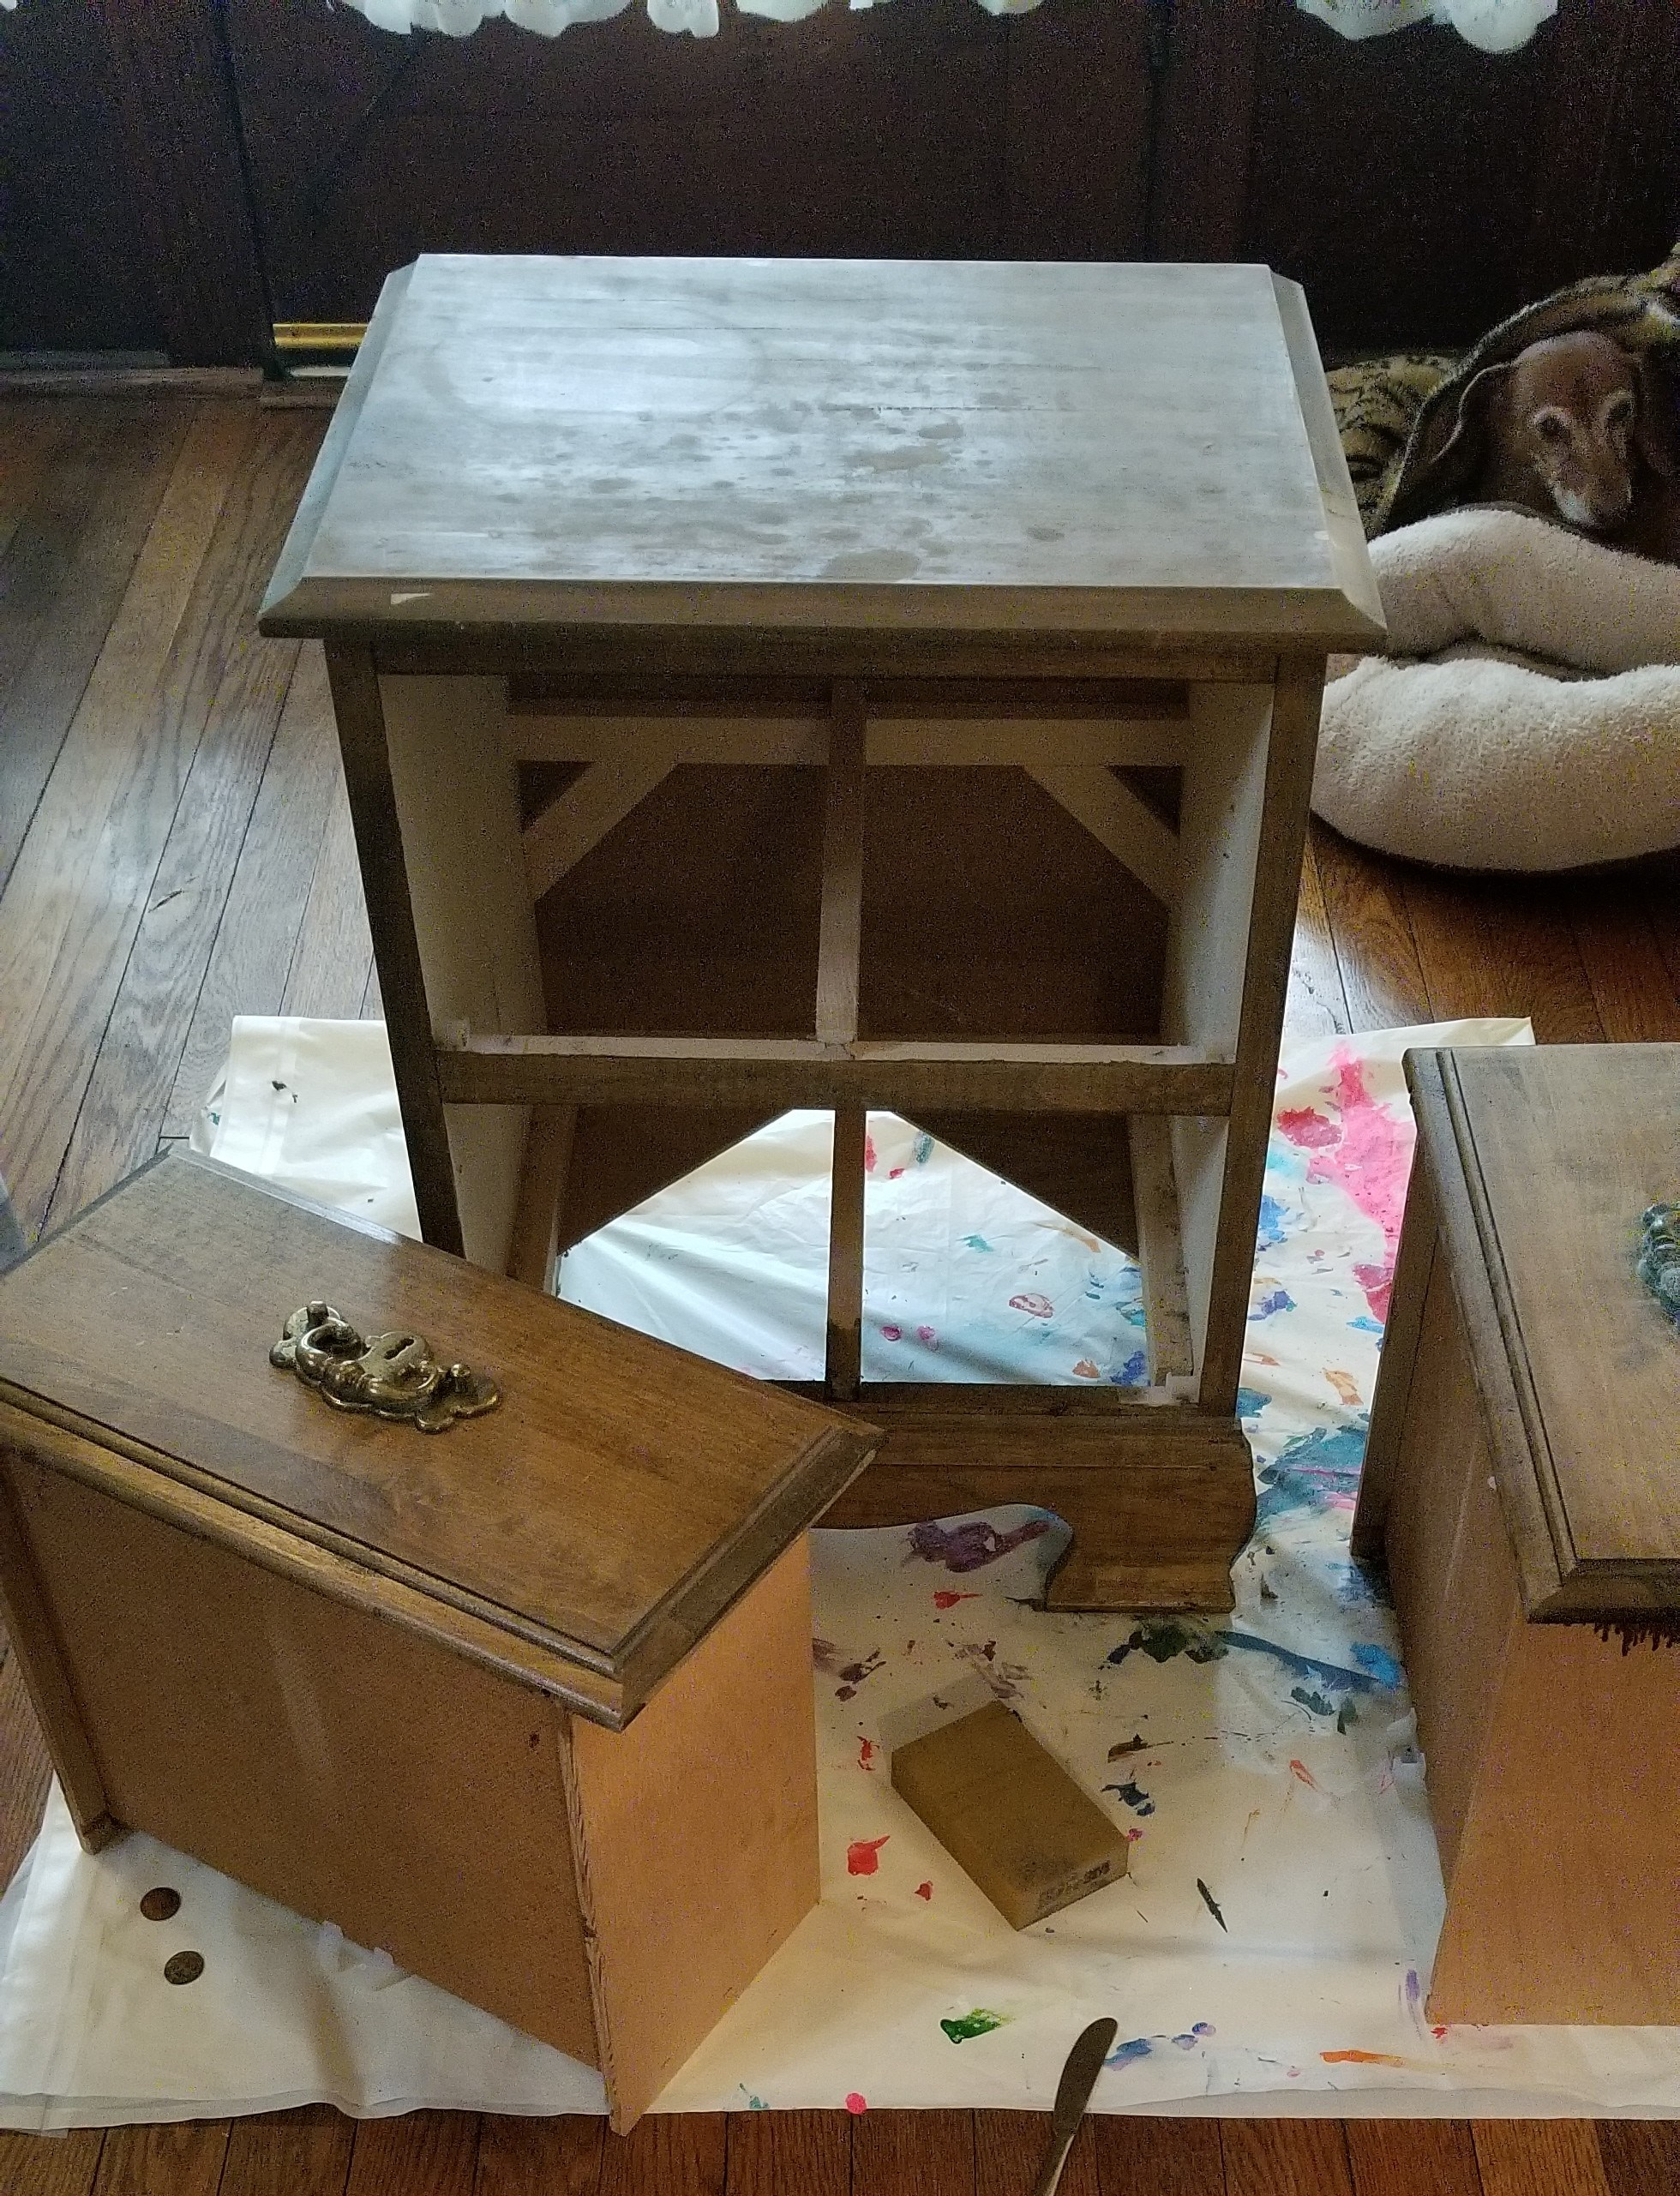
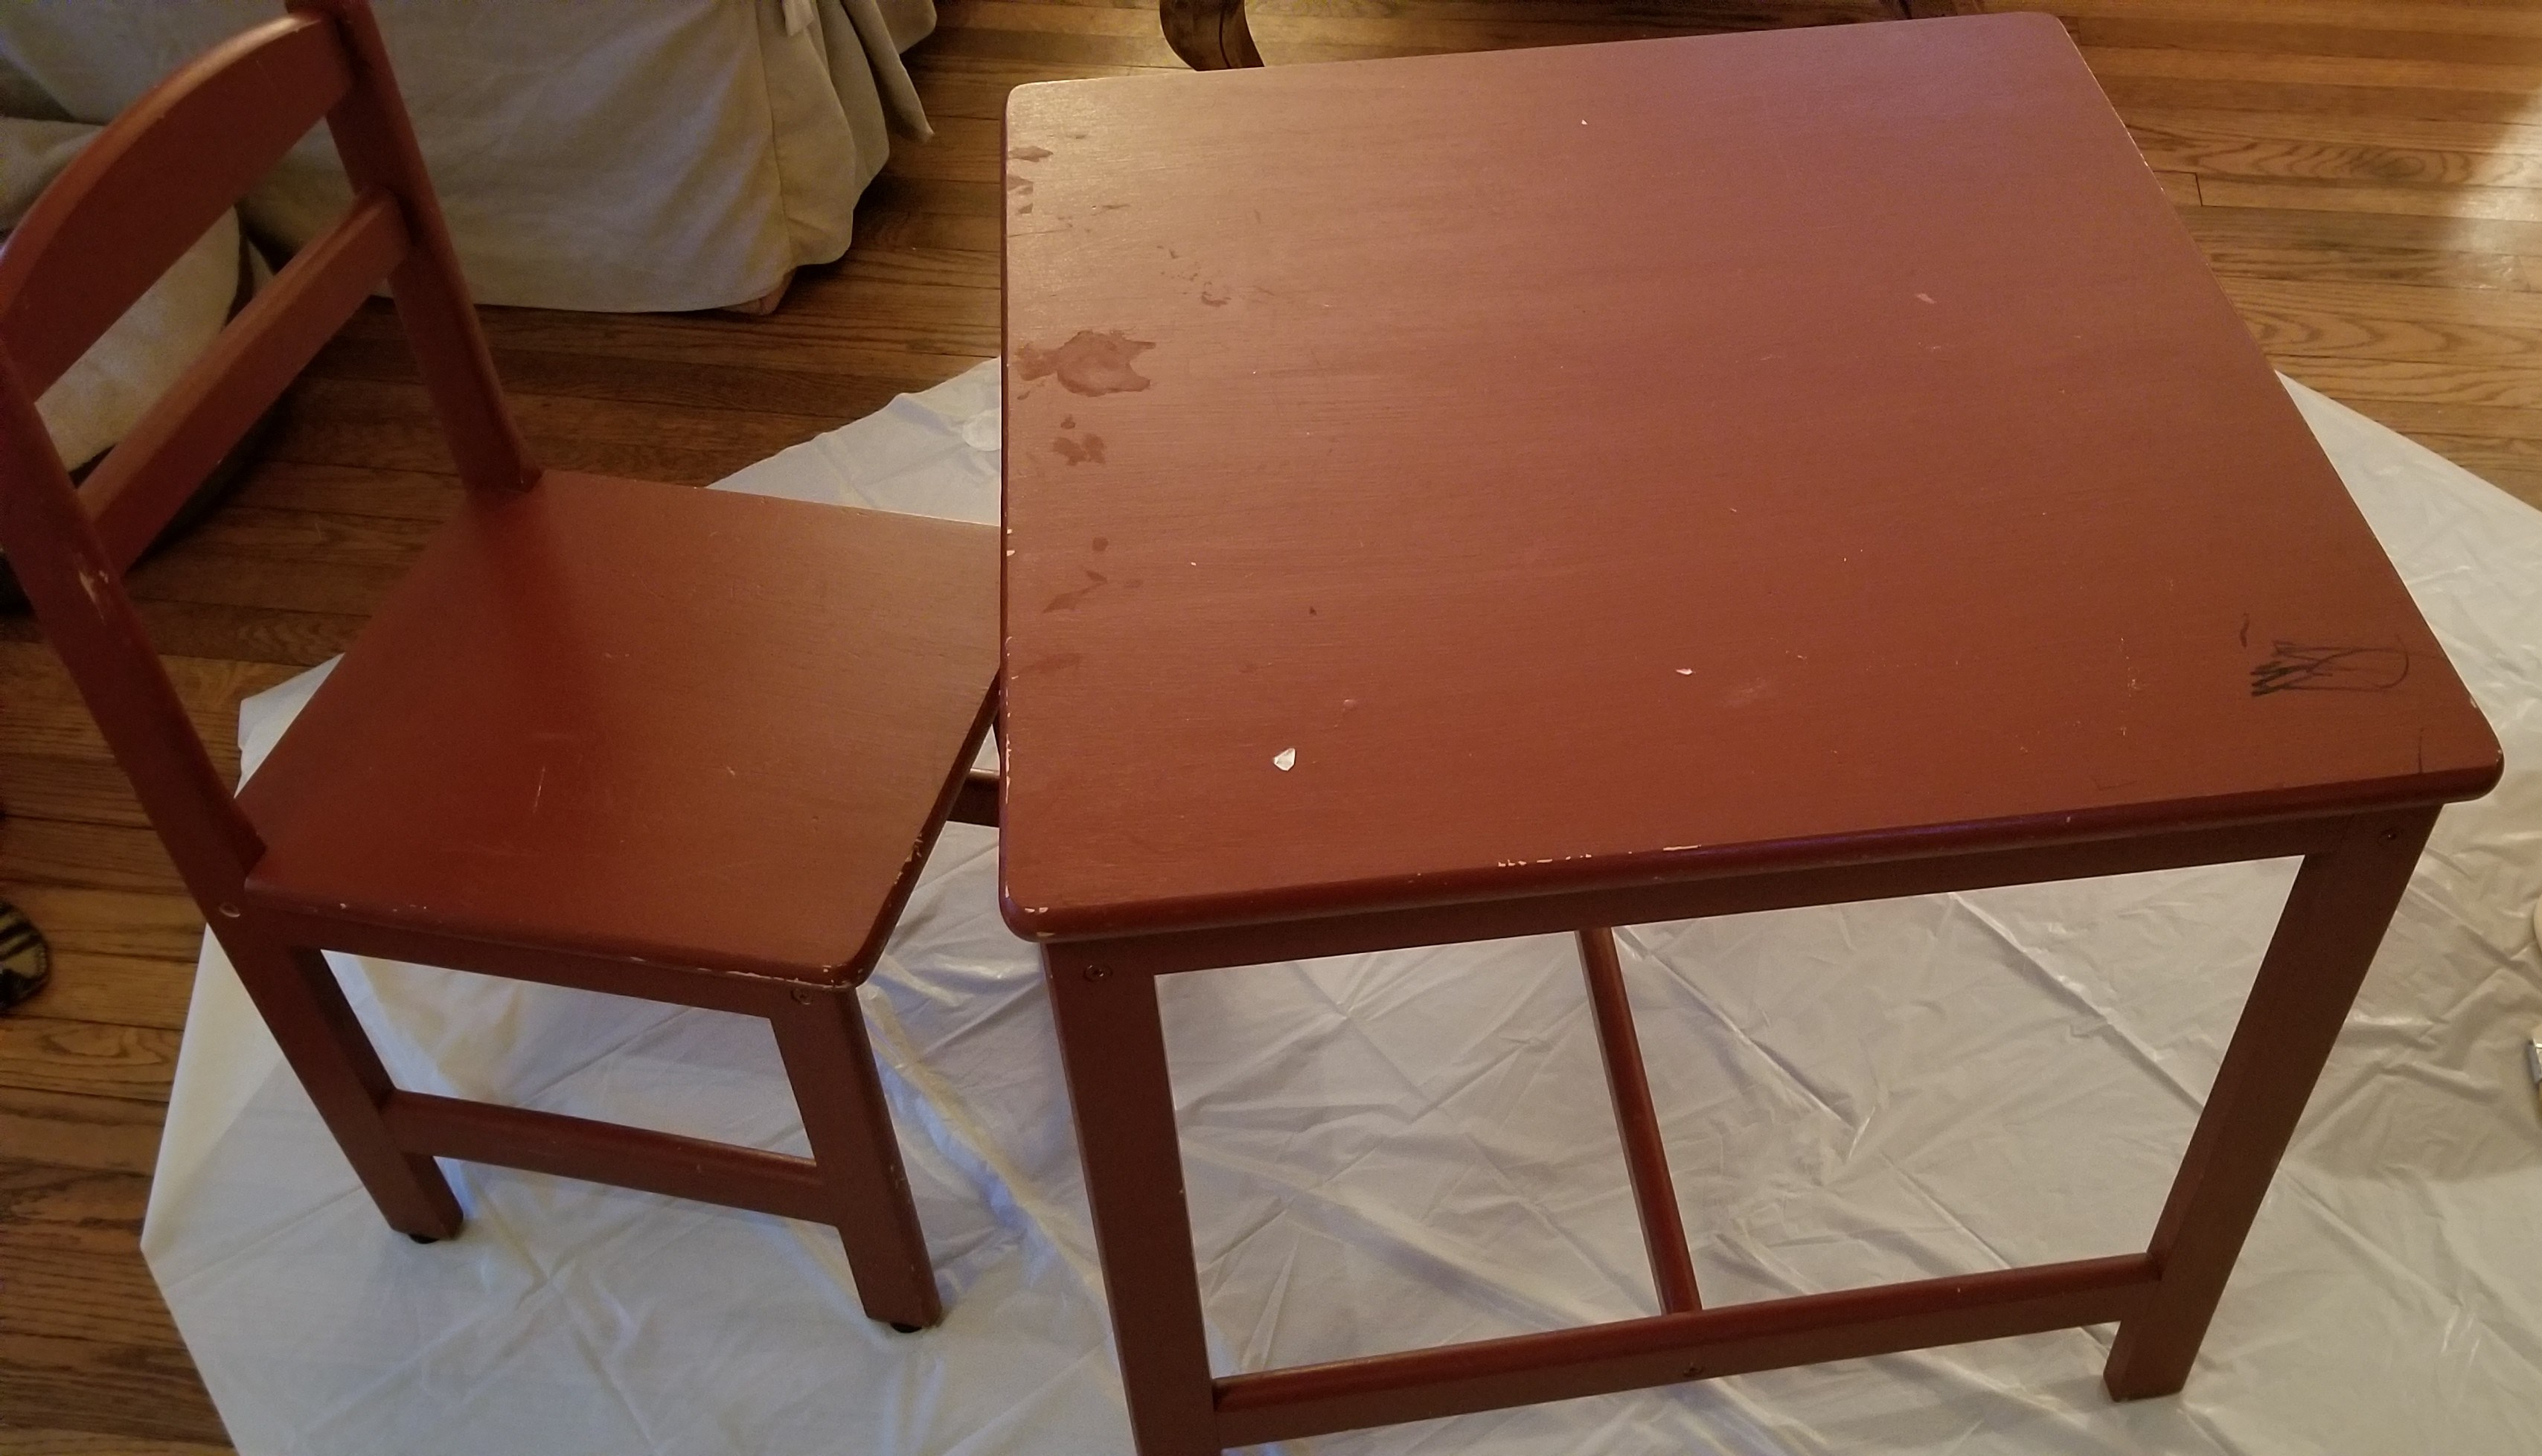
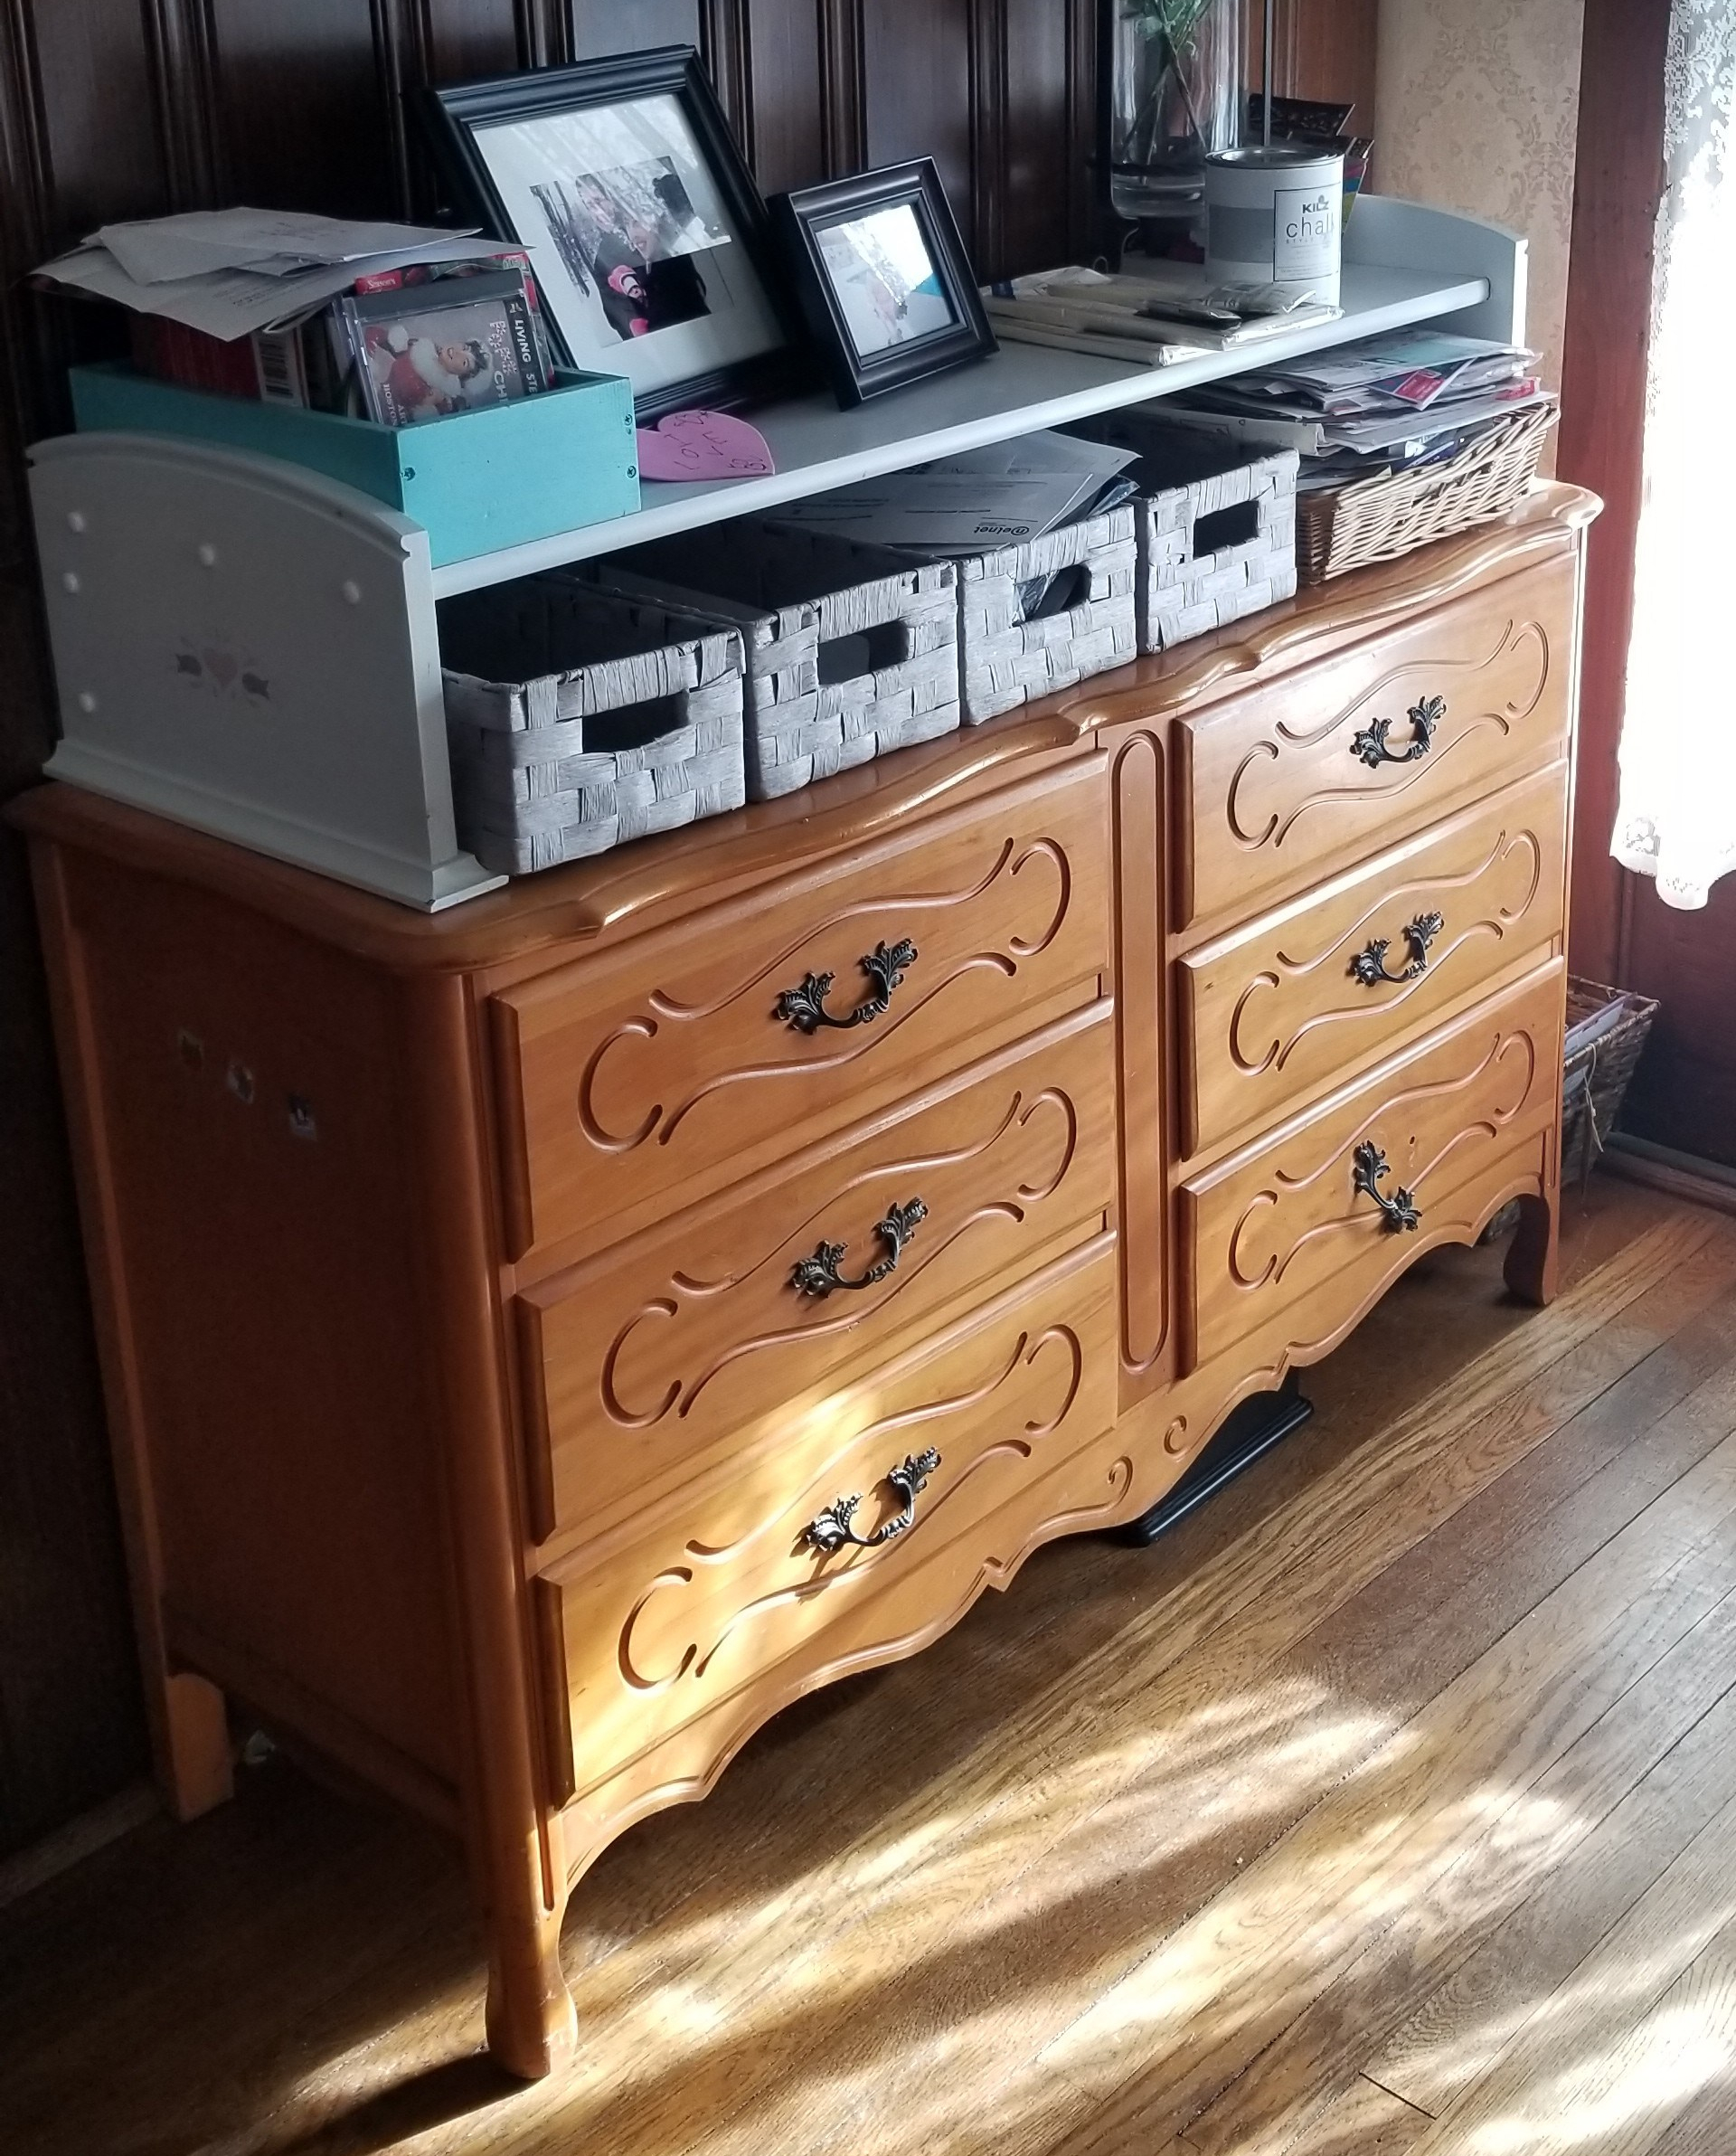
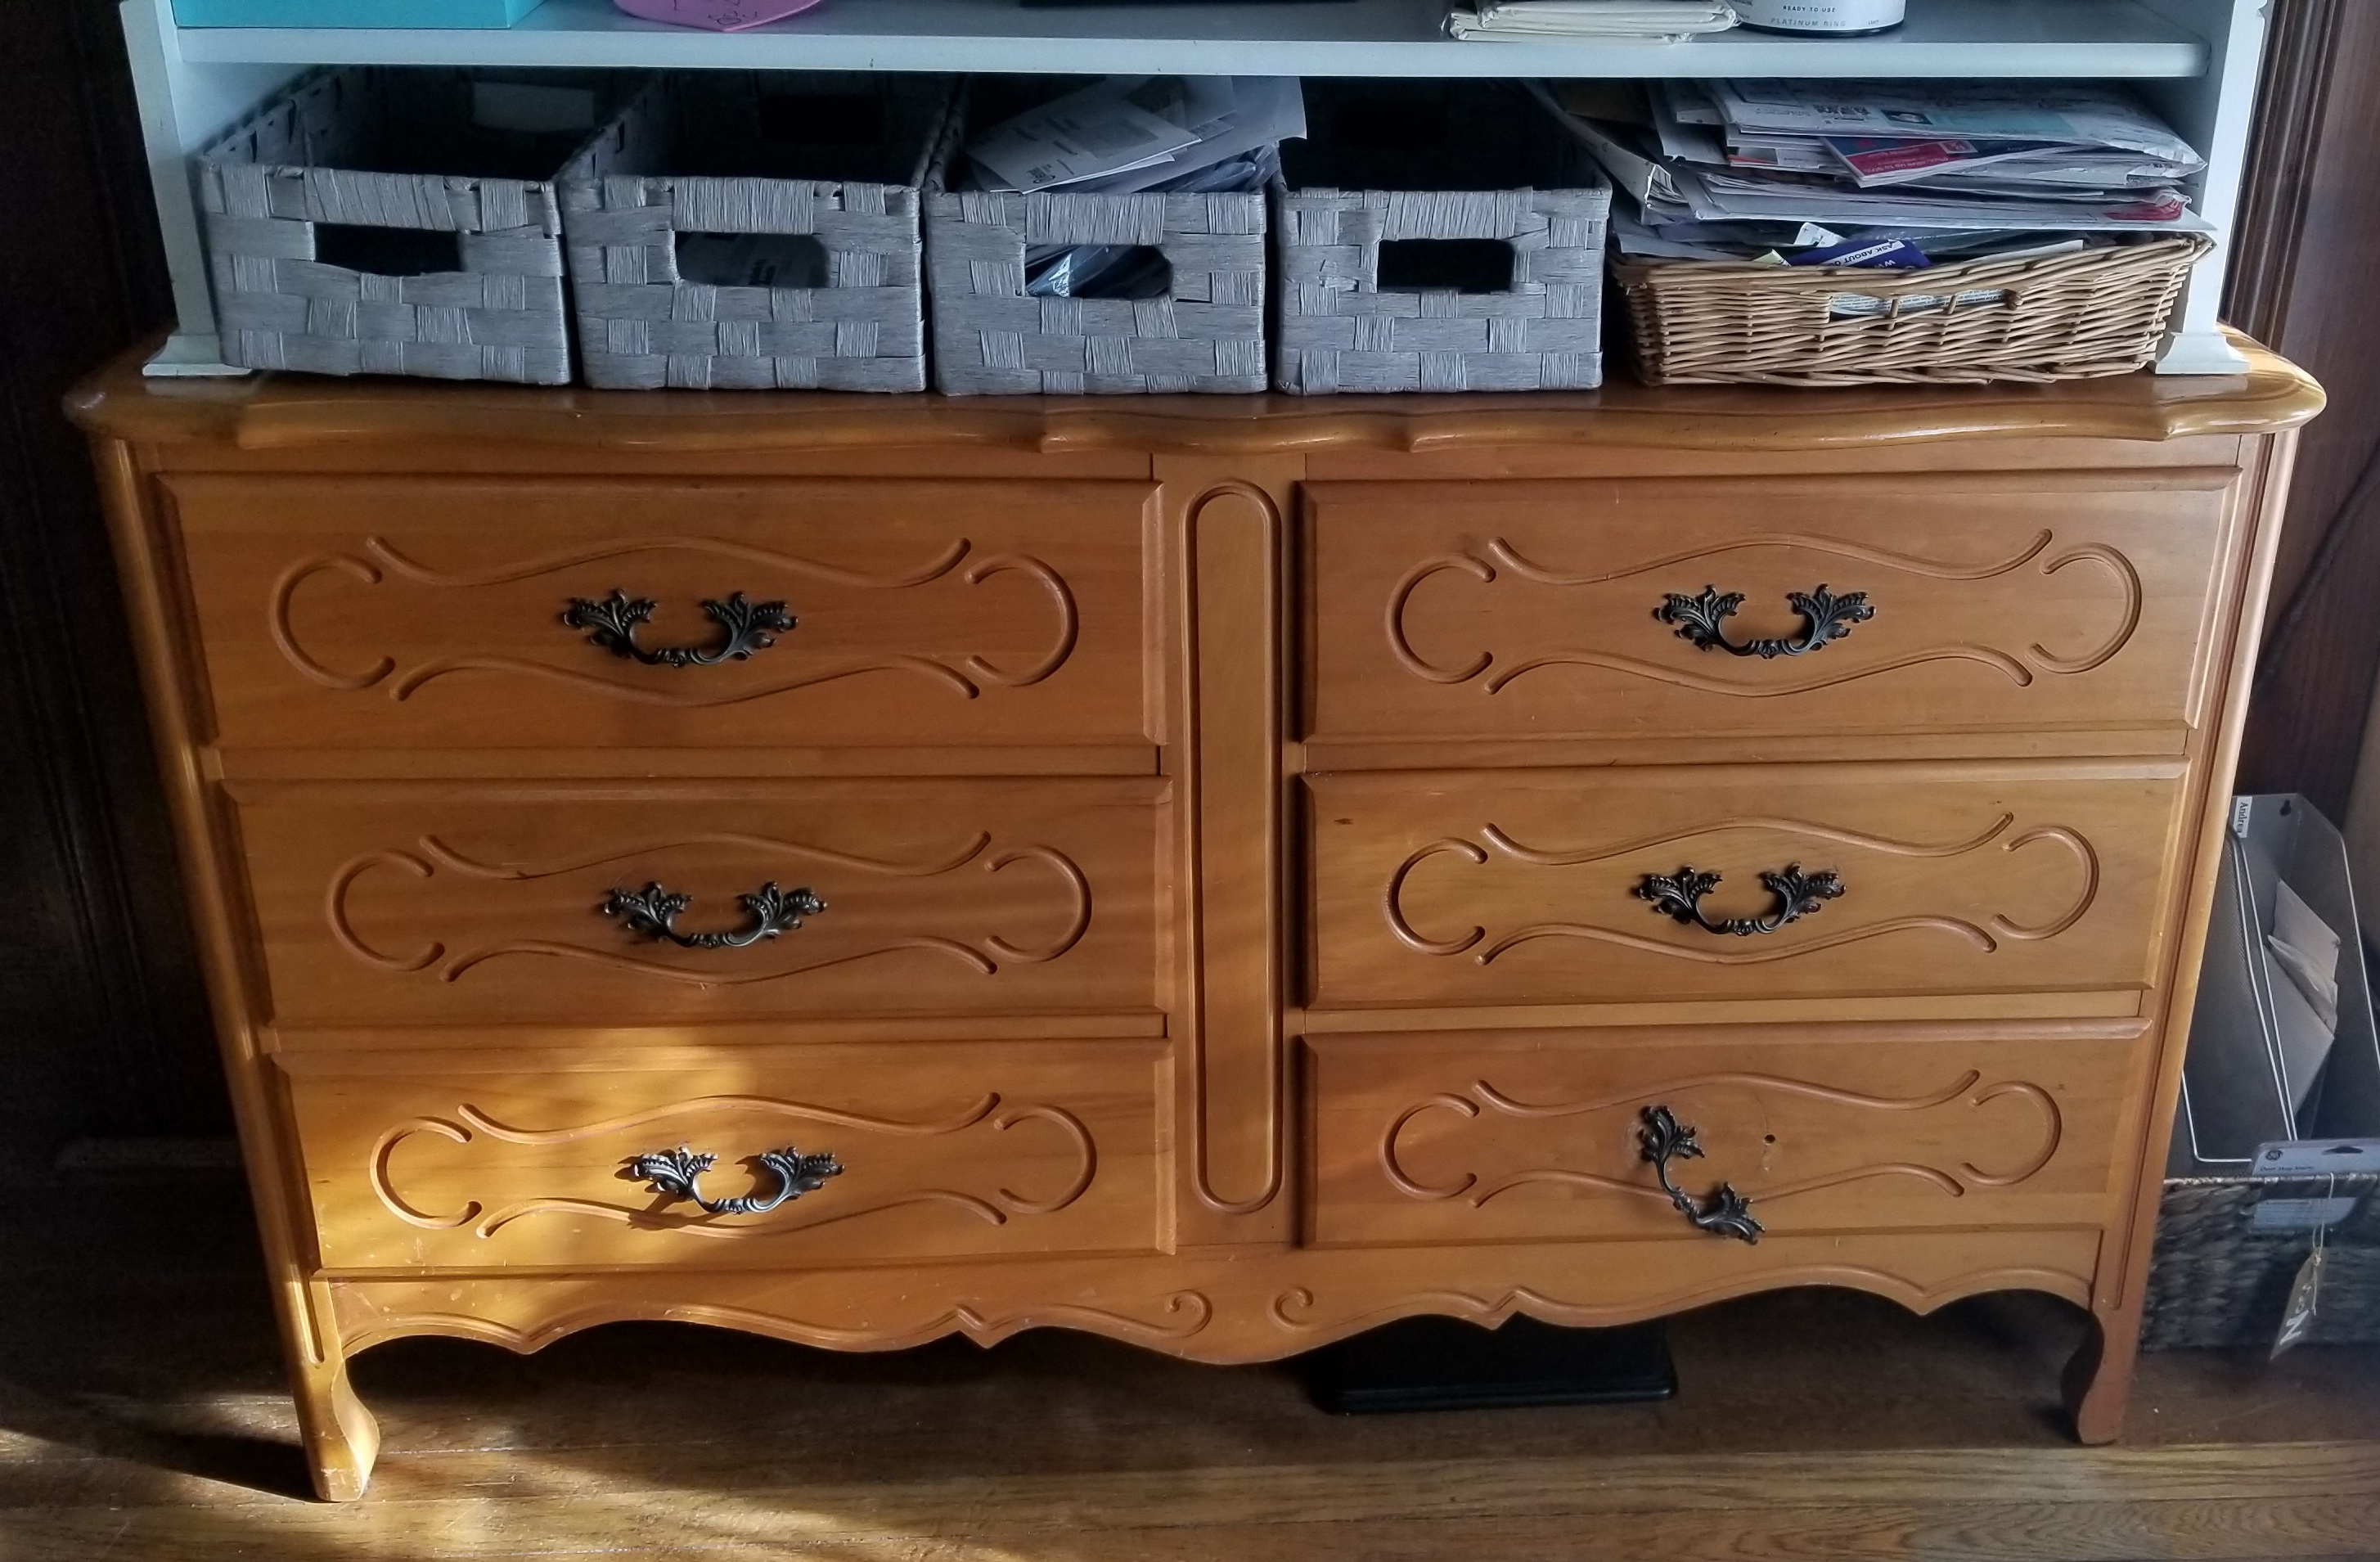
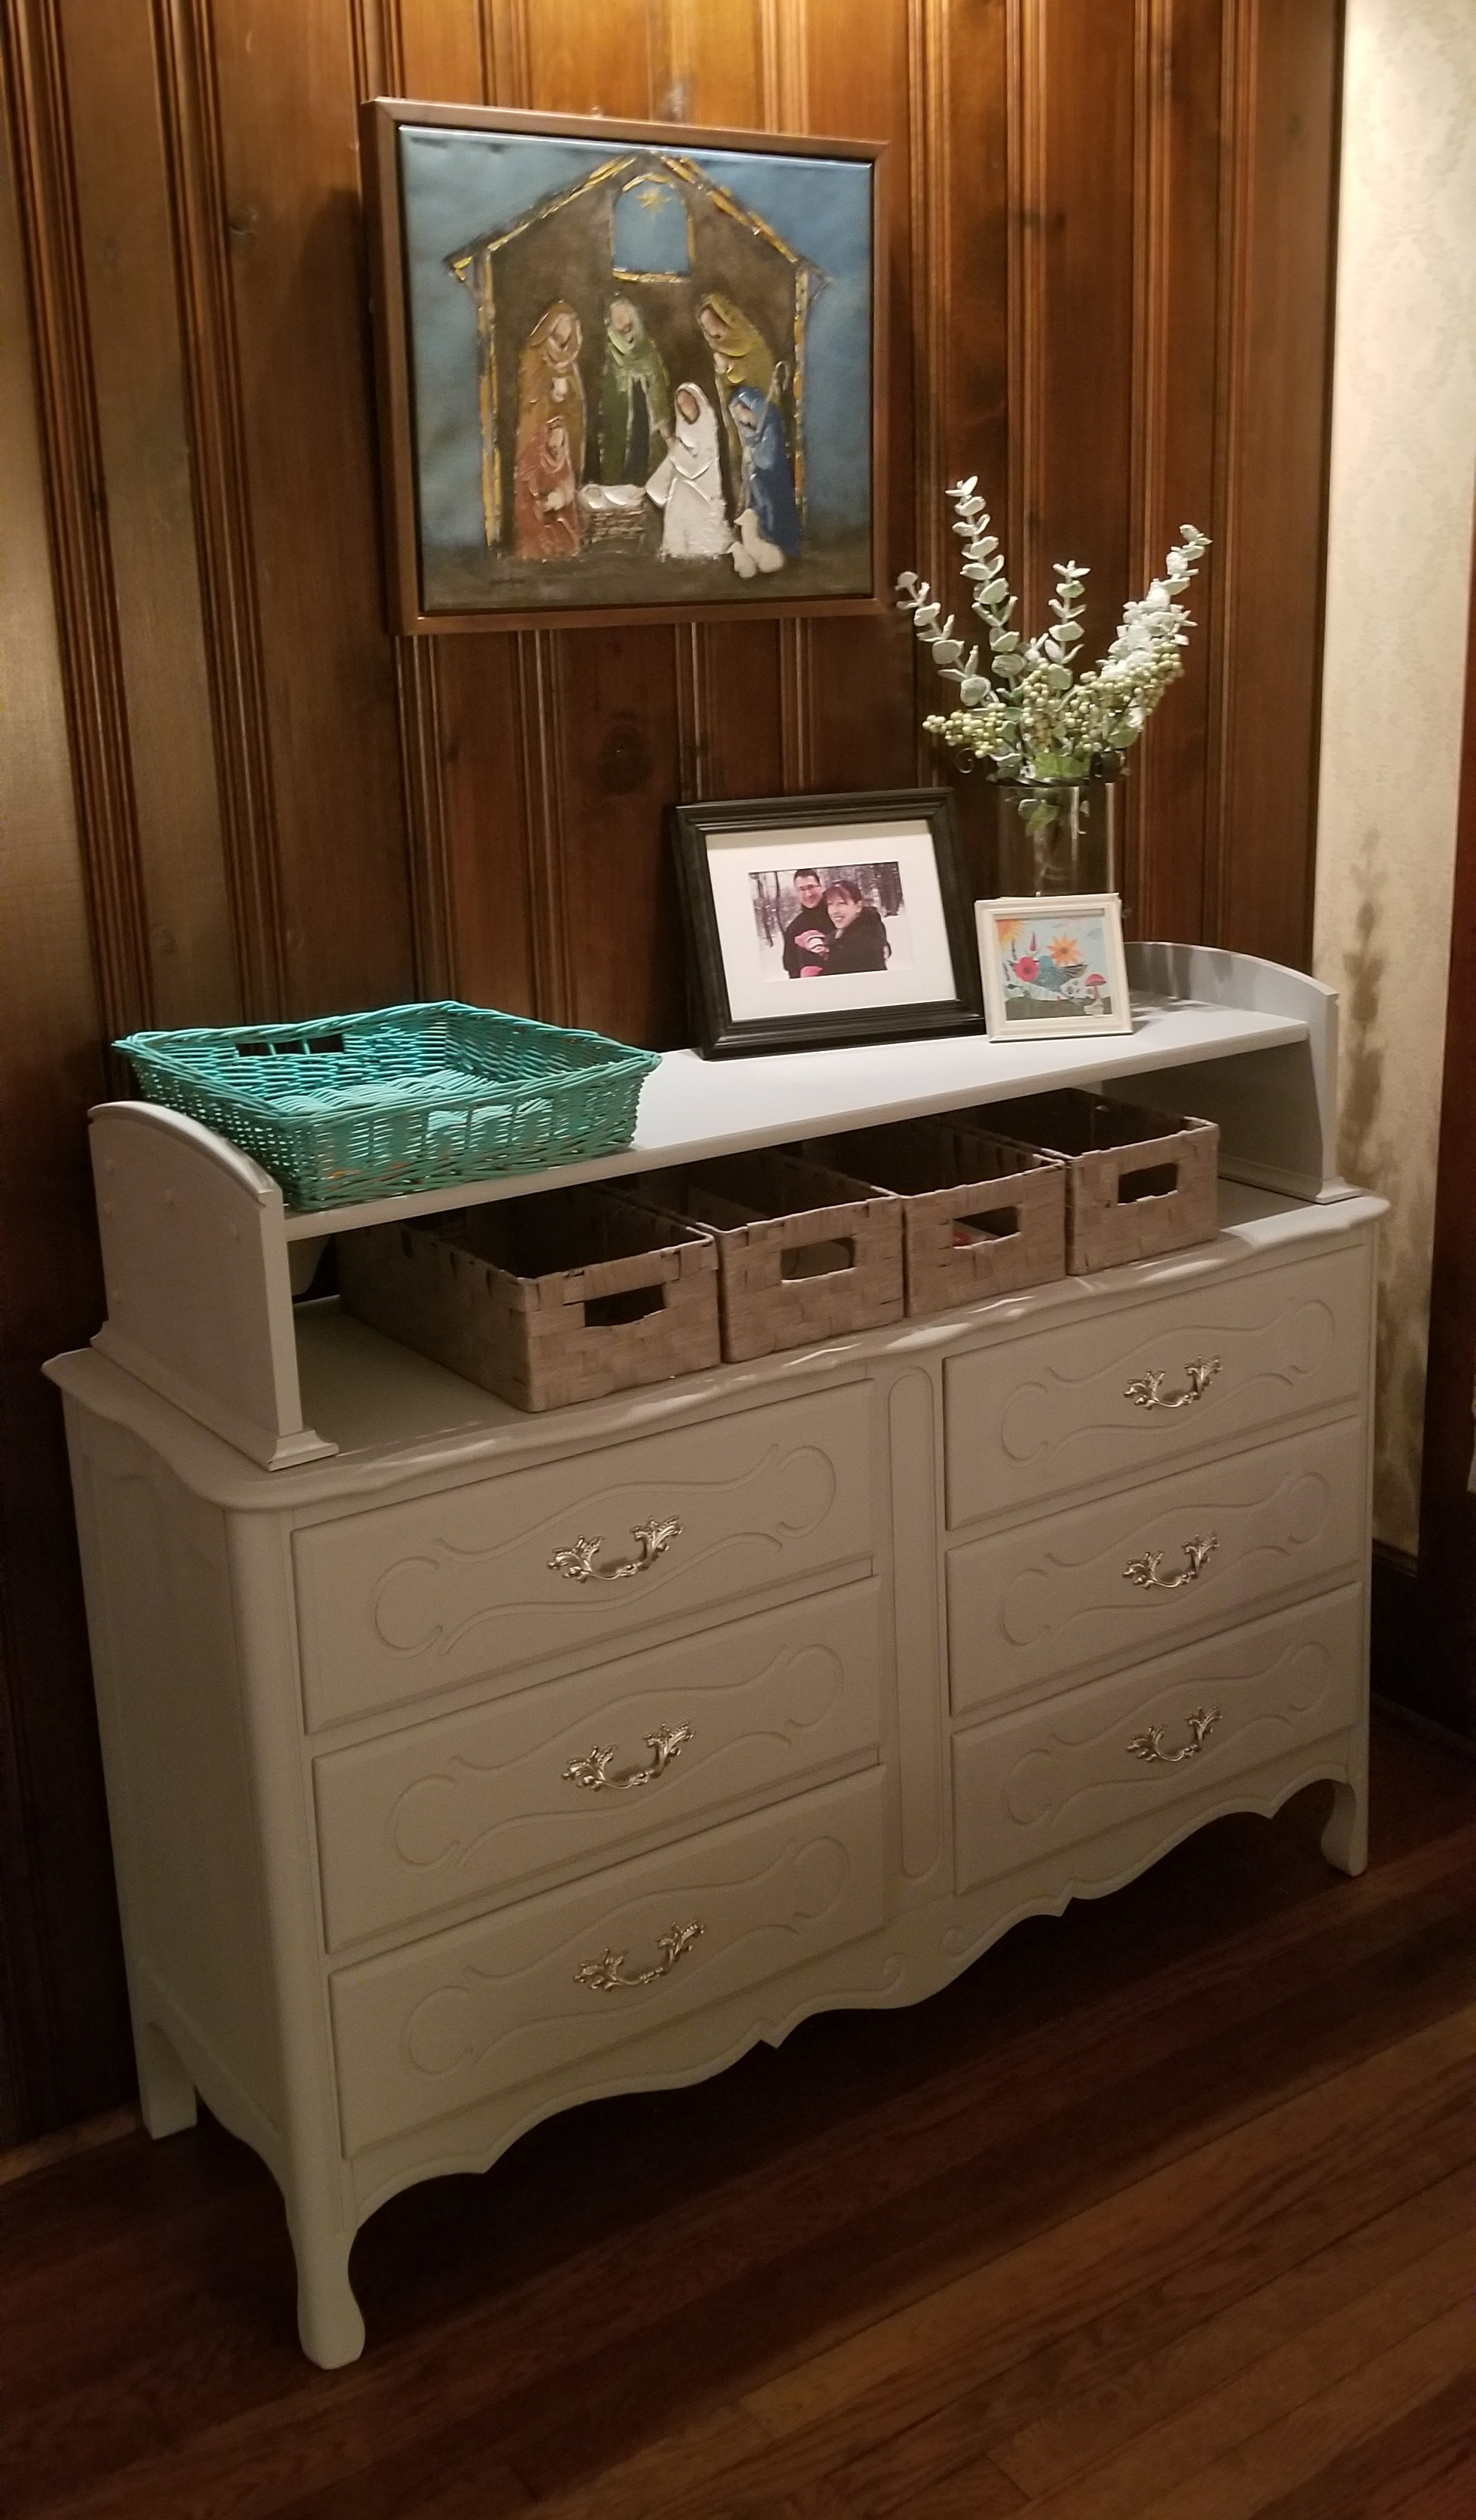
I found this little side table/mini dresser on the side of the road, naturally.  It’s been in the garage collecting dust until I recognized a need for some extra storage for my girls’ pajamas.  They have so. many. pajamas.

So, being a small piece in a little girl room, I thought “let’s finally do hot pink!”

20190223_143100

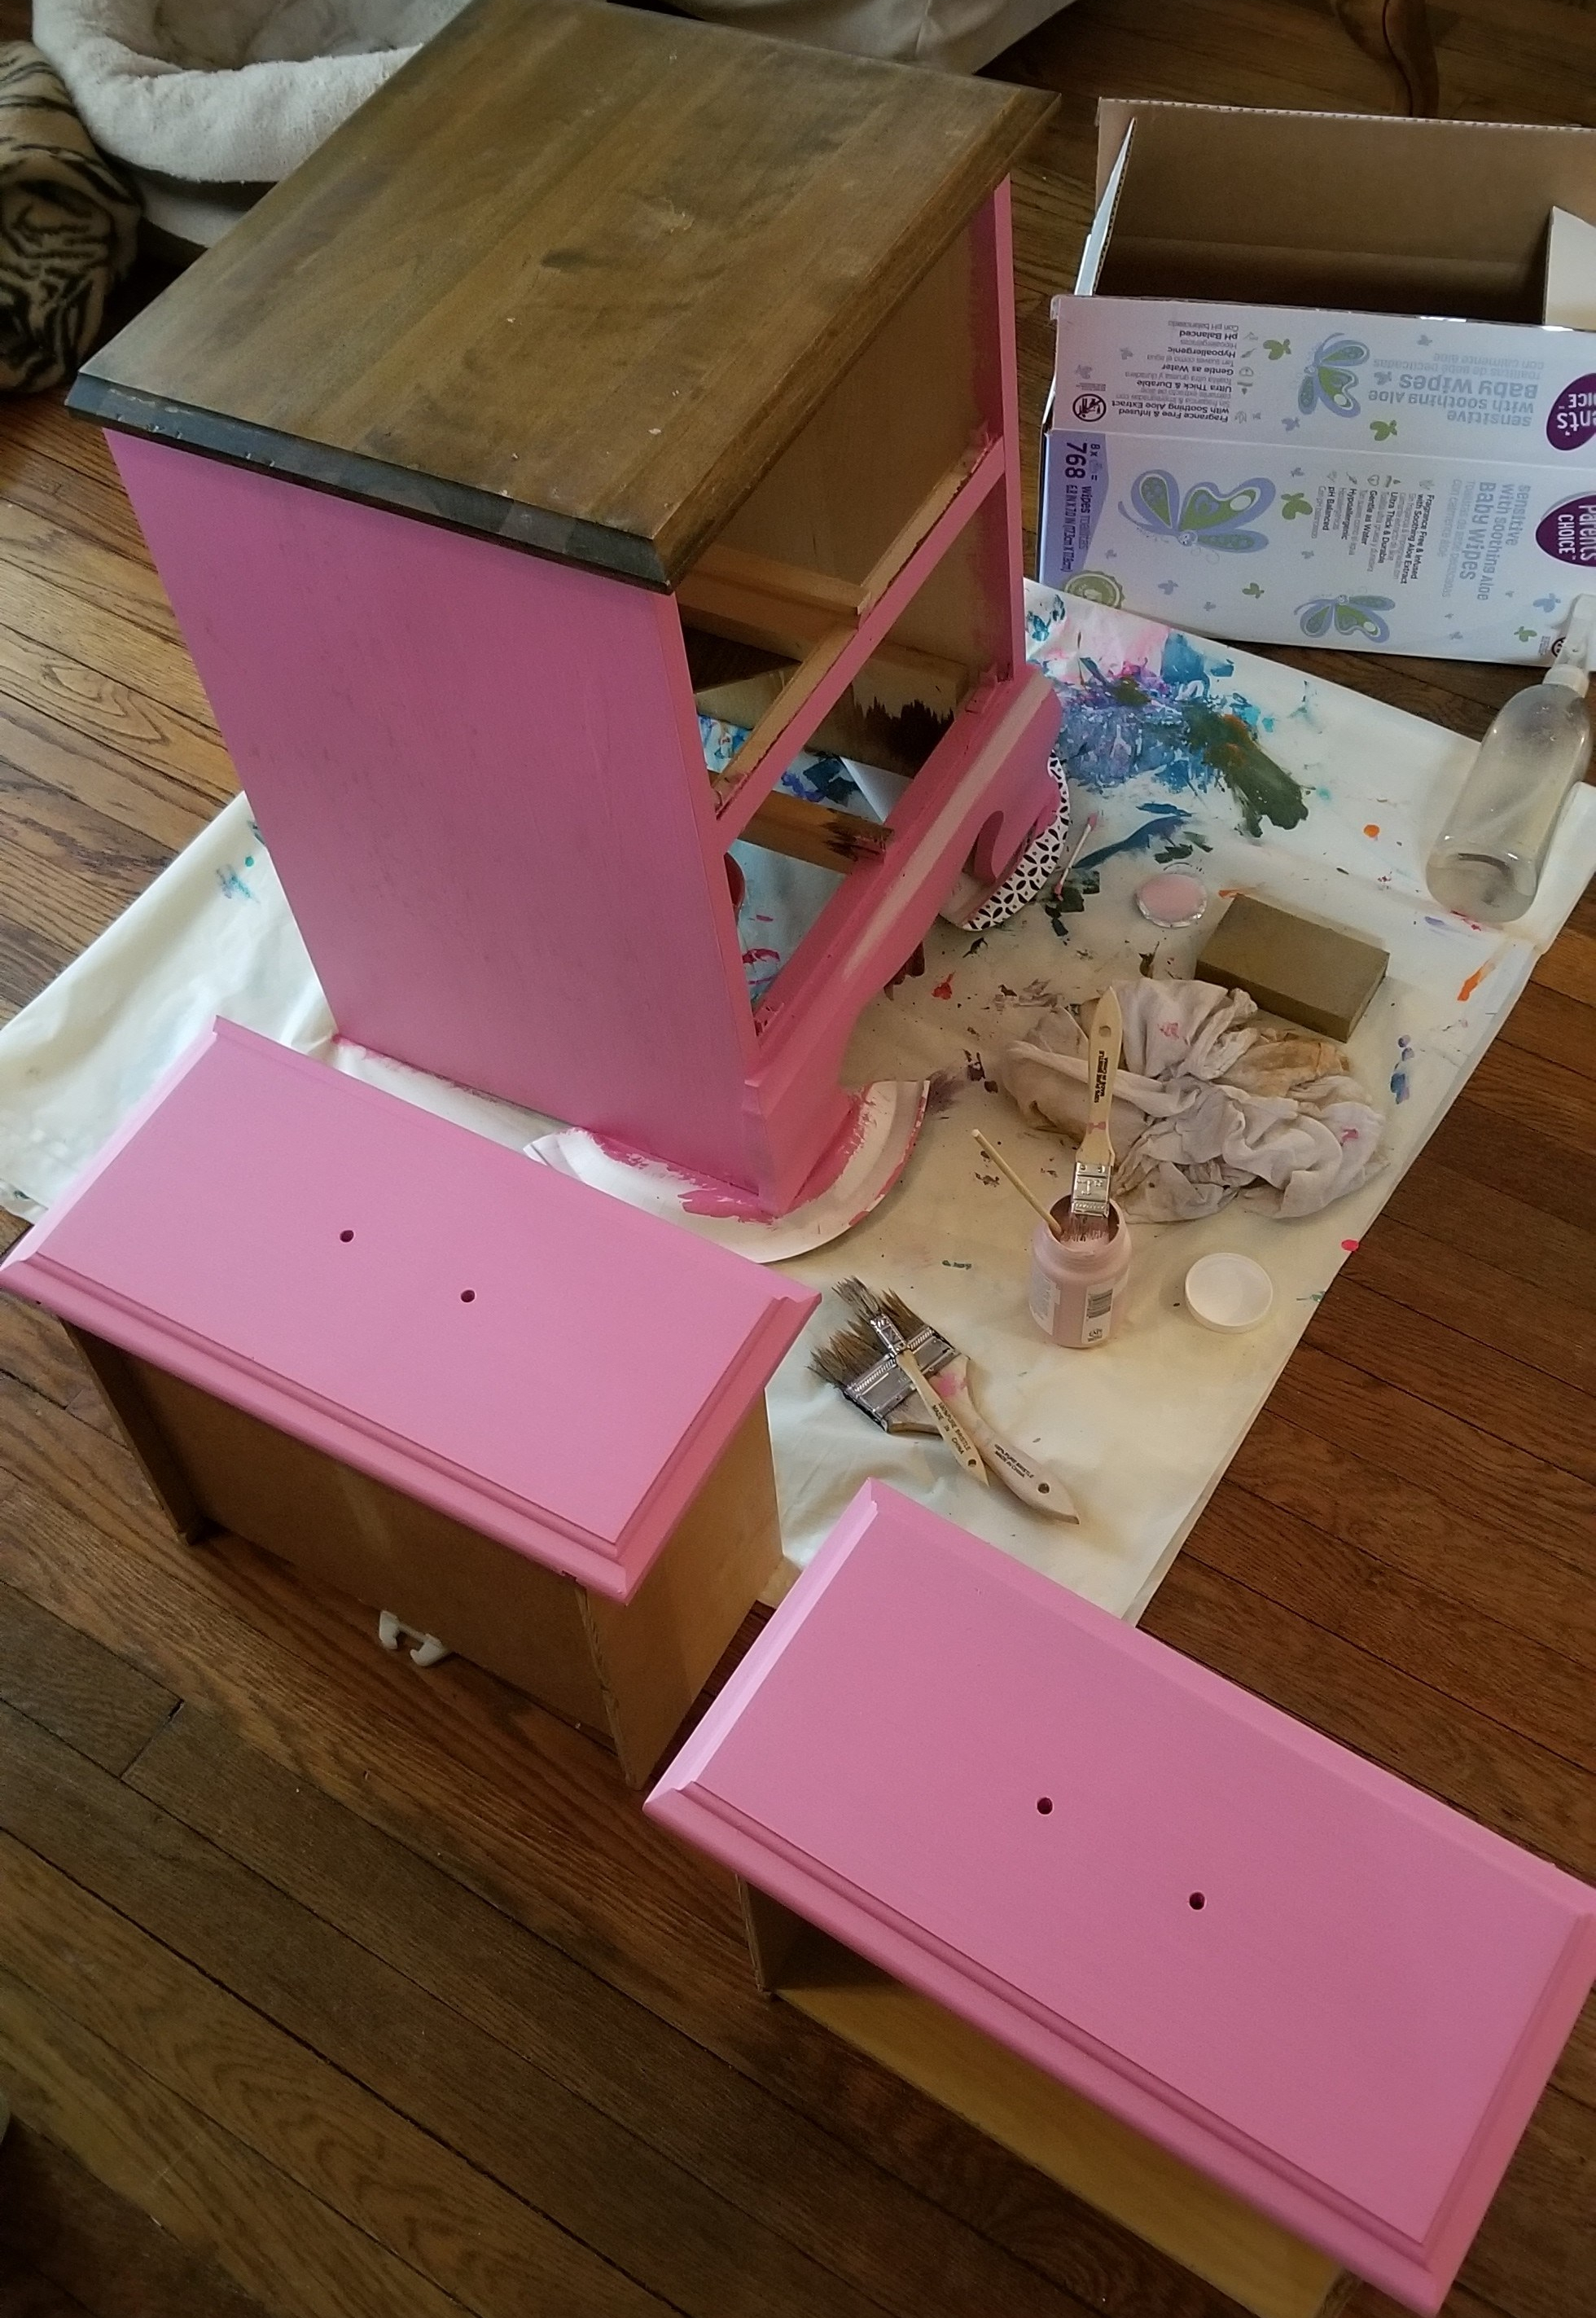
That turned into a big, fat “nope” real fast.

You can’t tell by looking at this picture, but that color, my friends, is definitely the exact same color as Pepto Bismol.

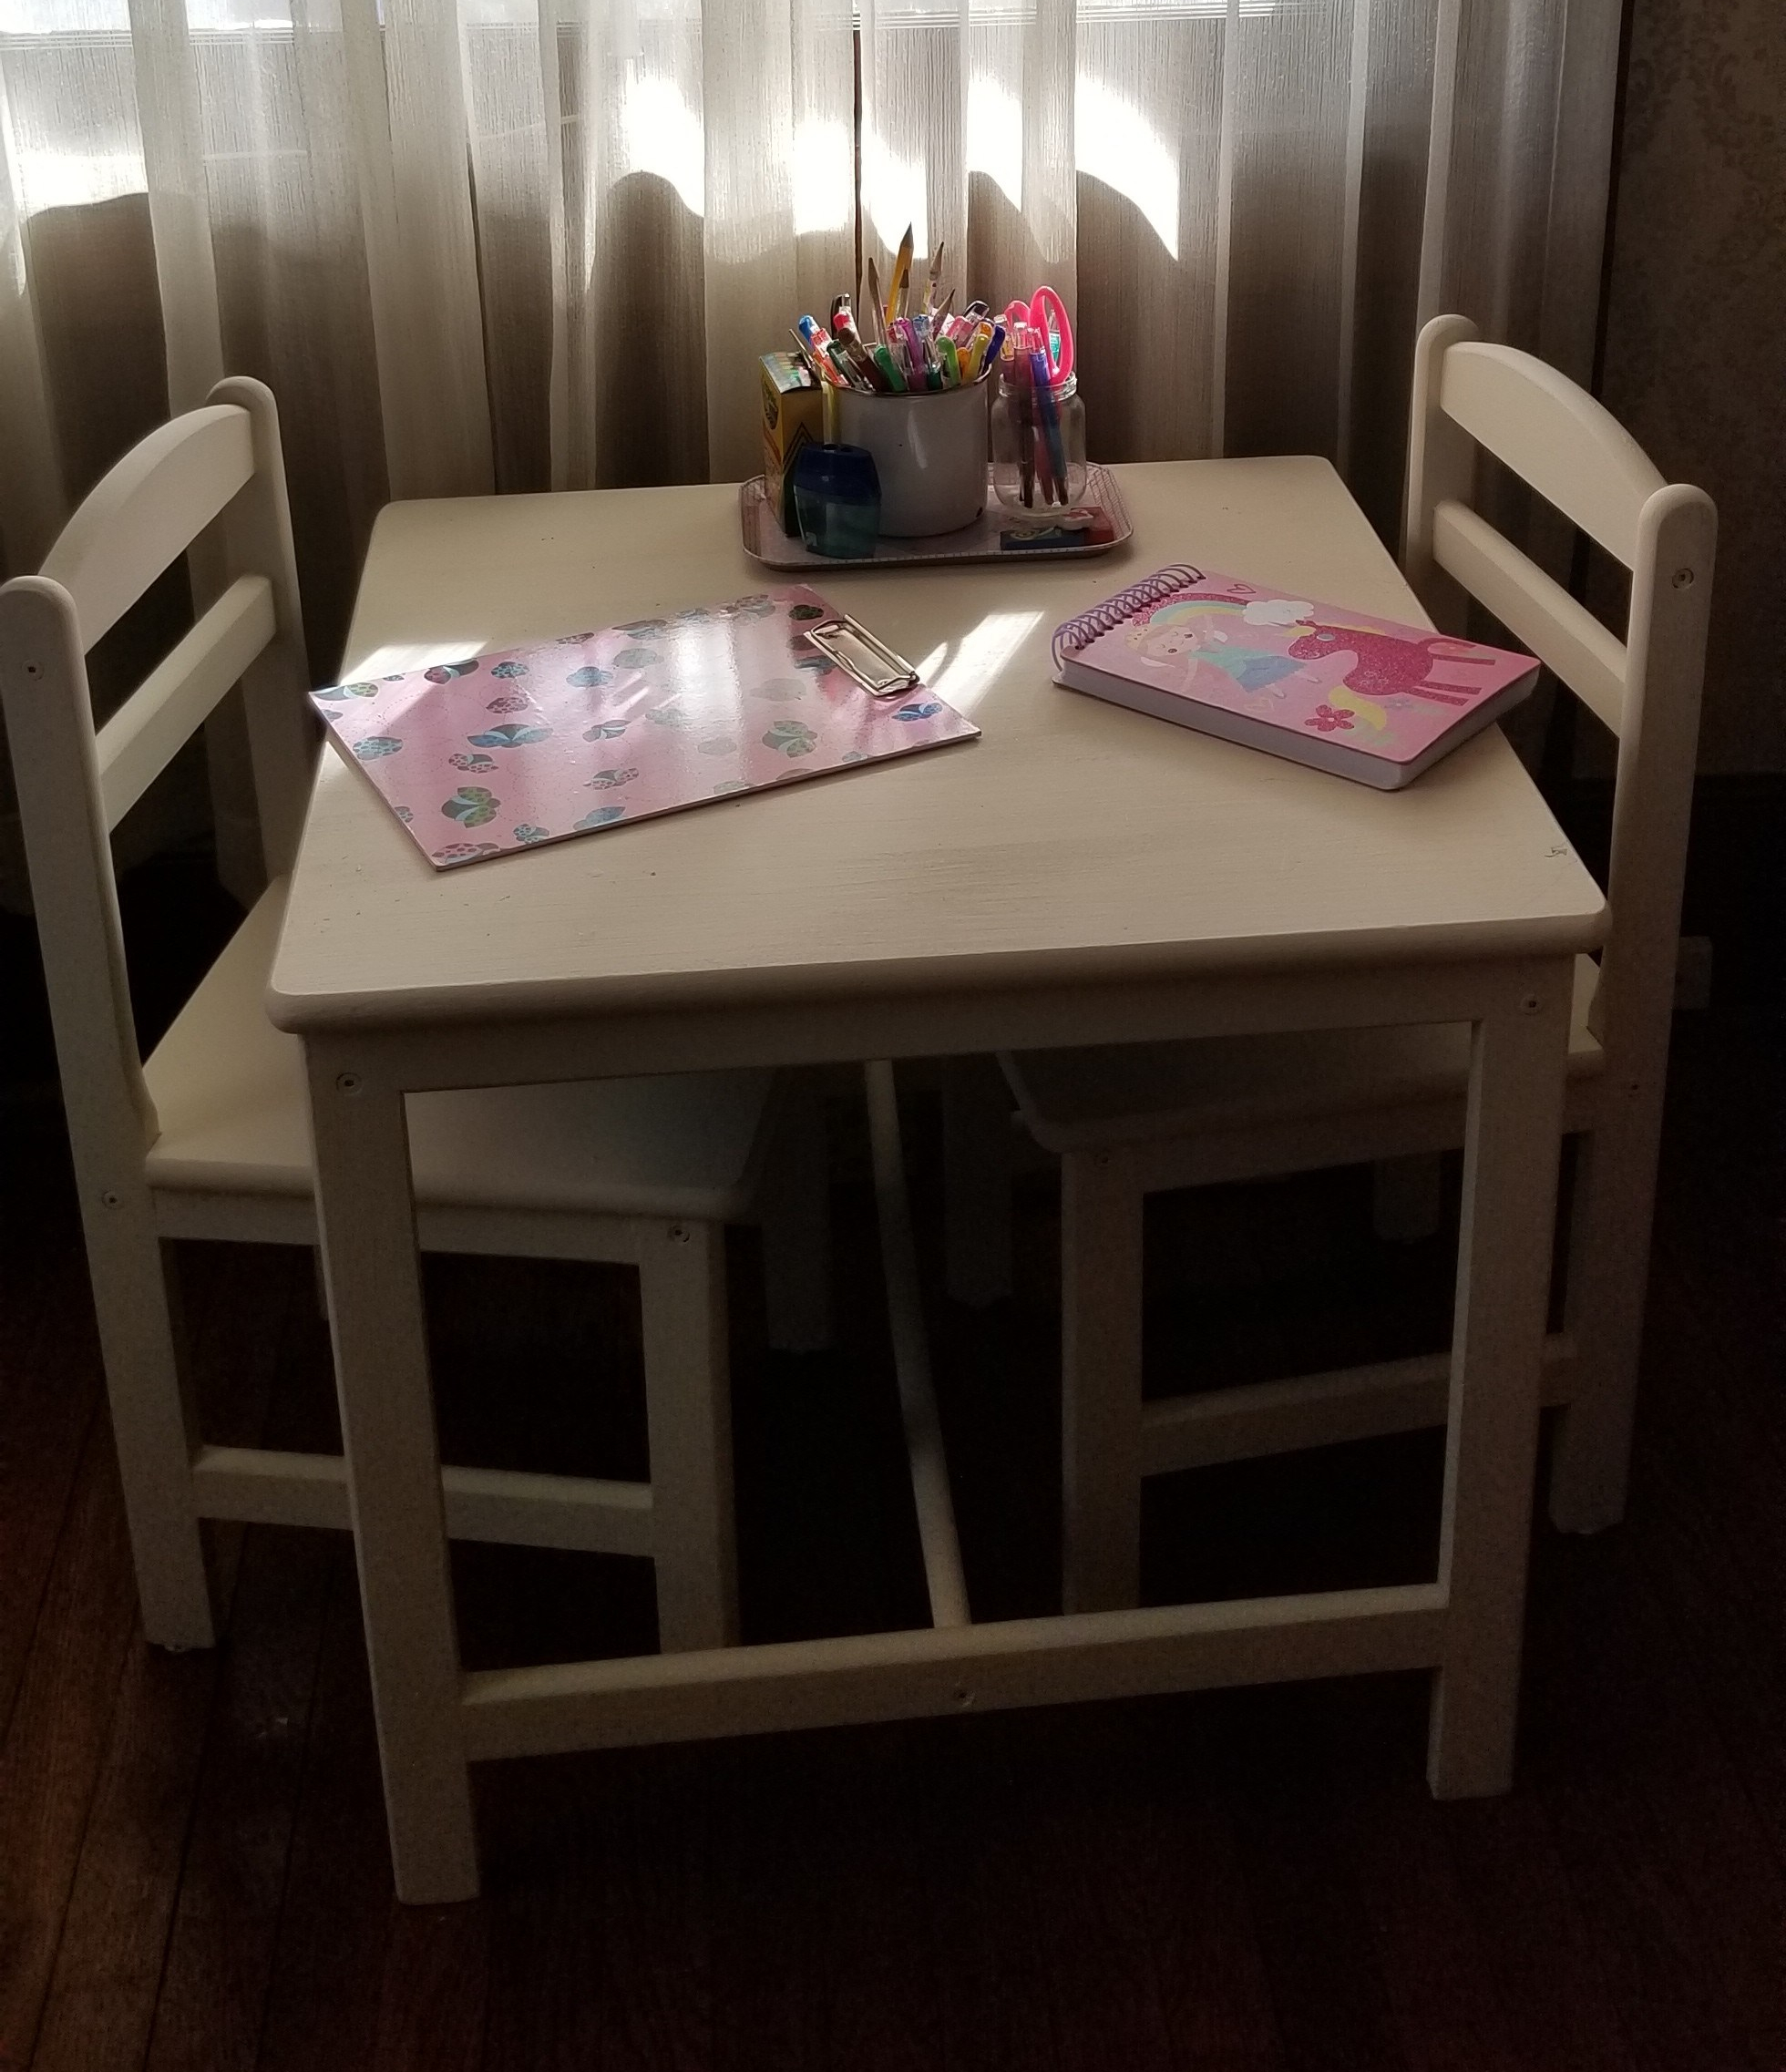
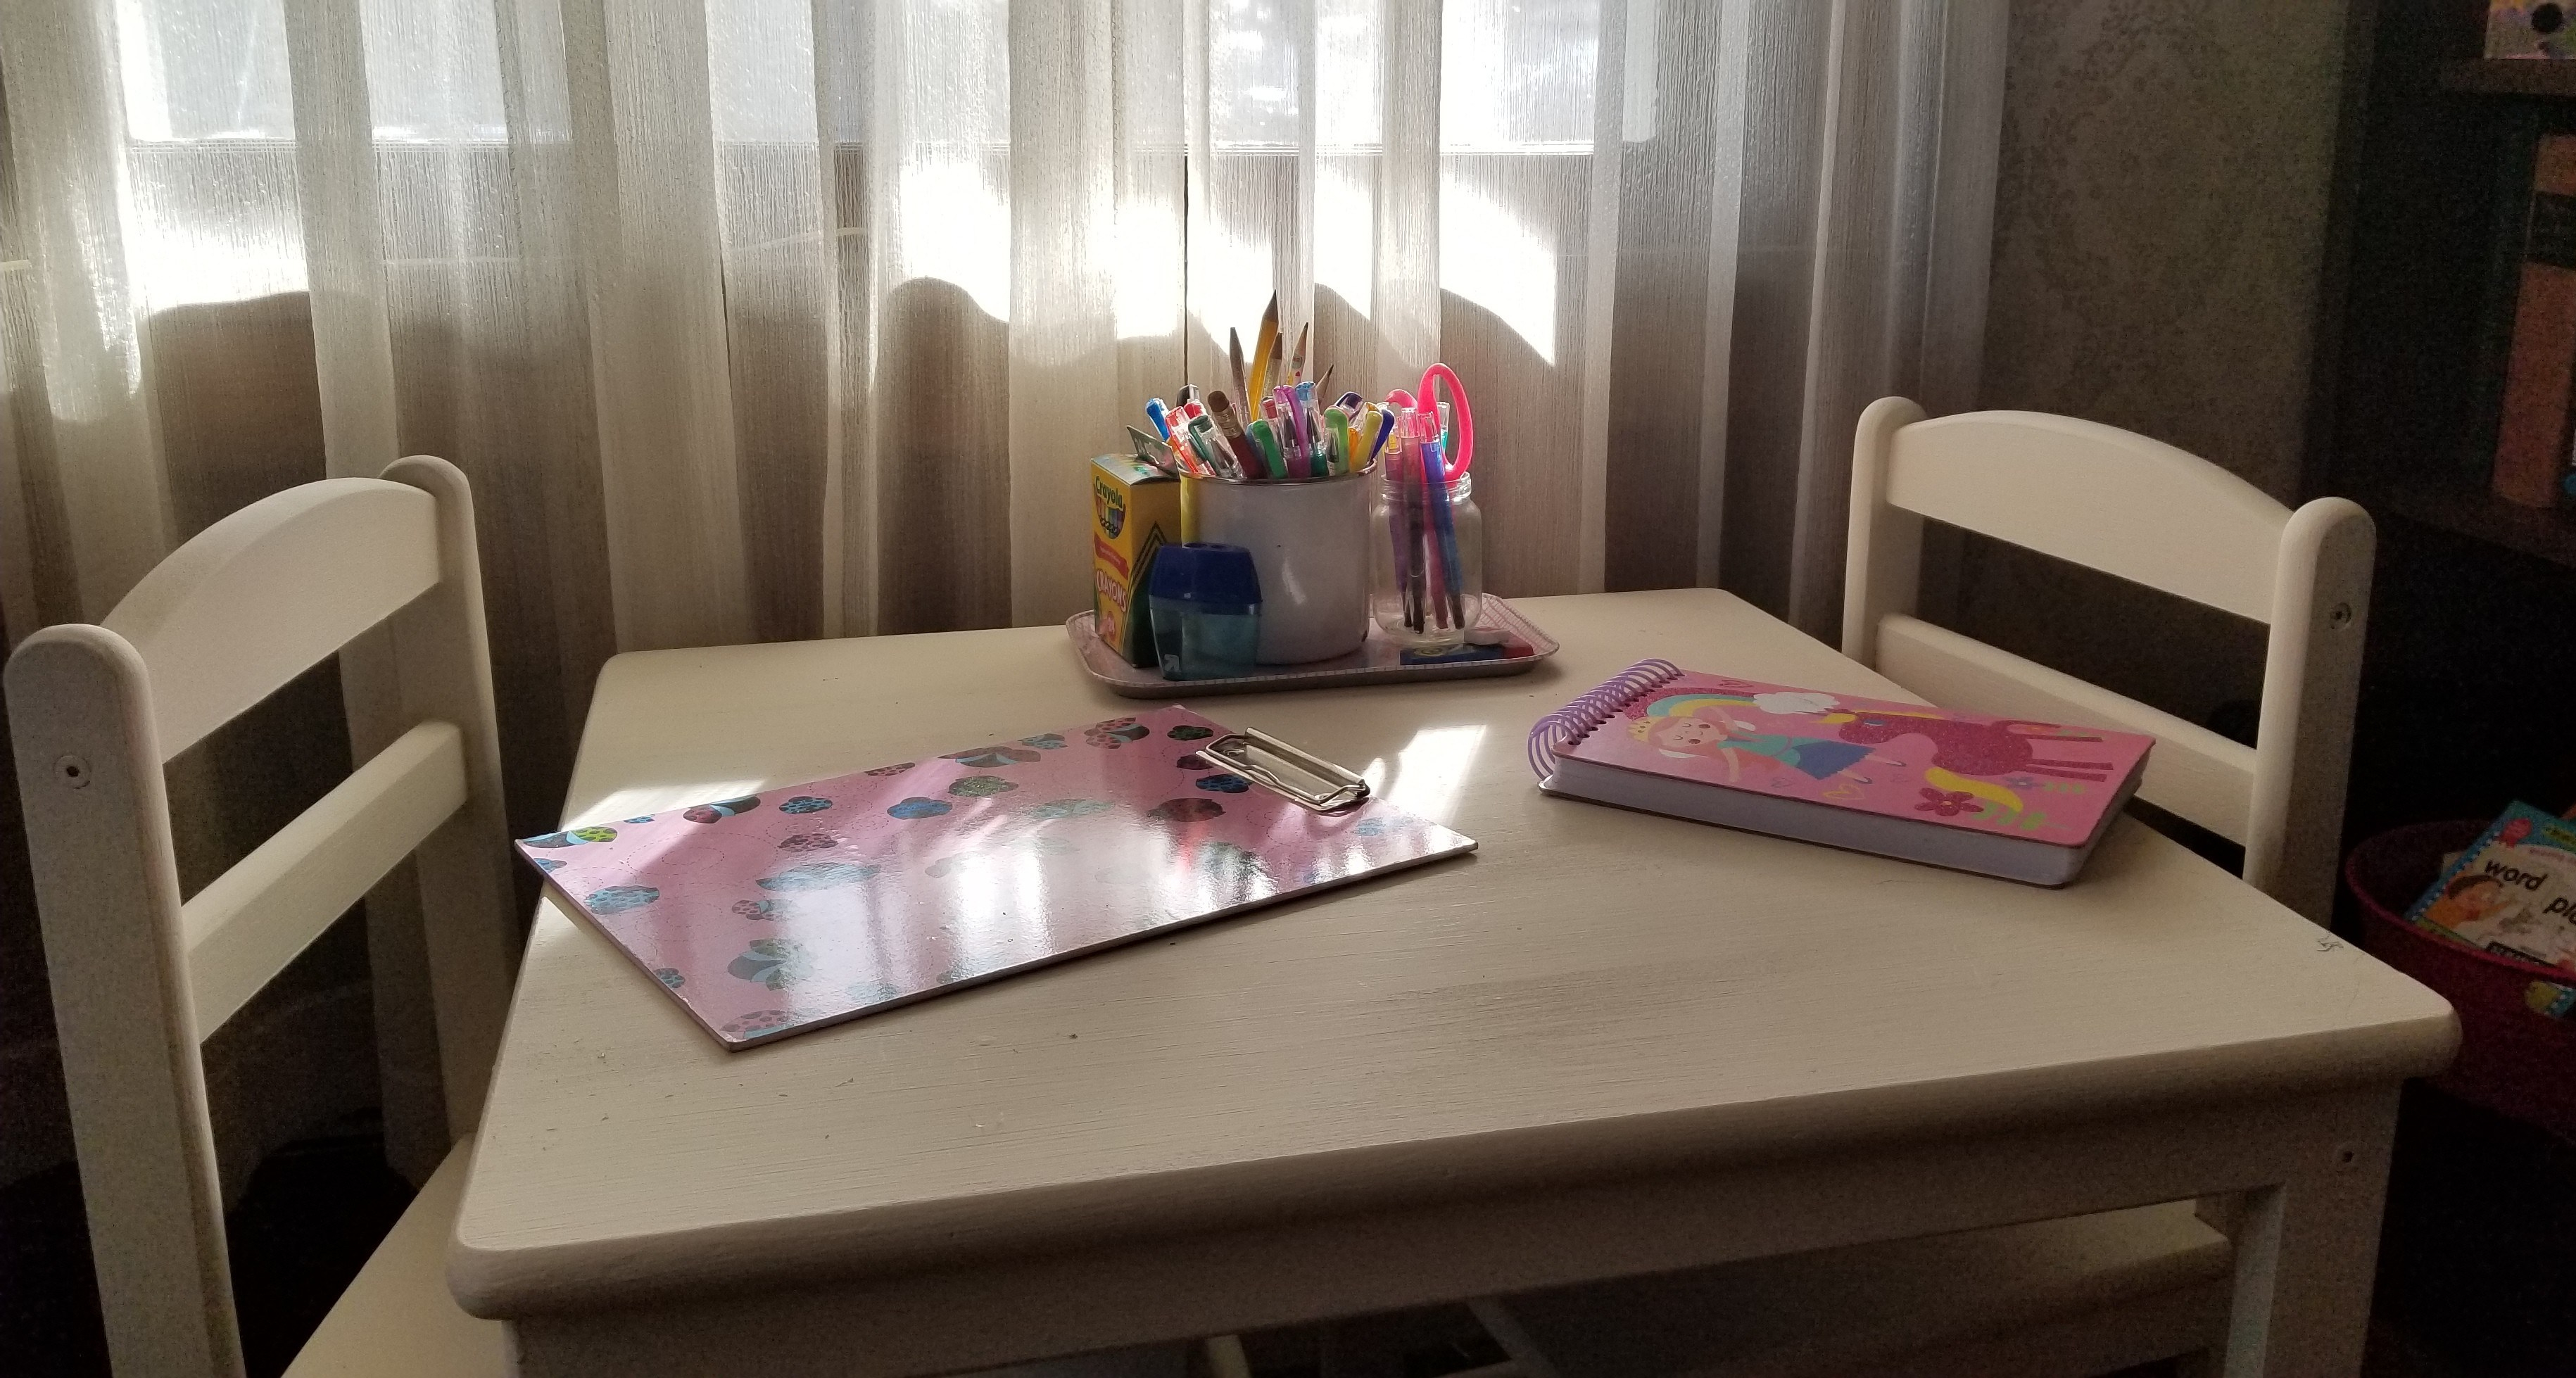
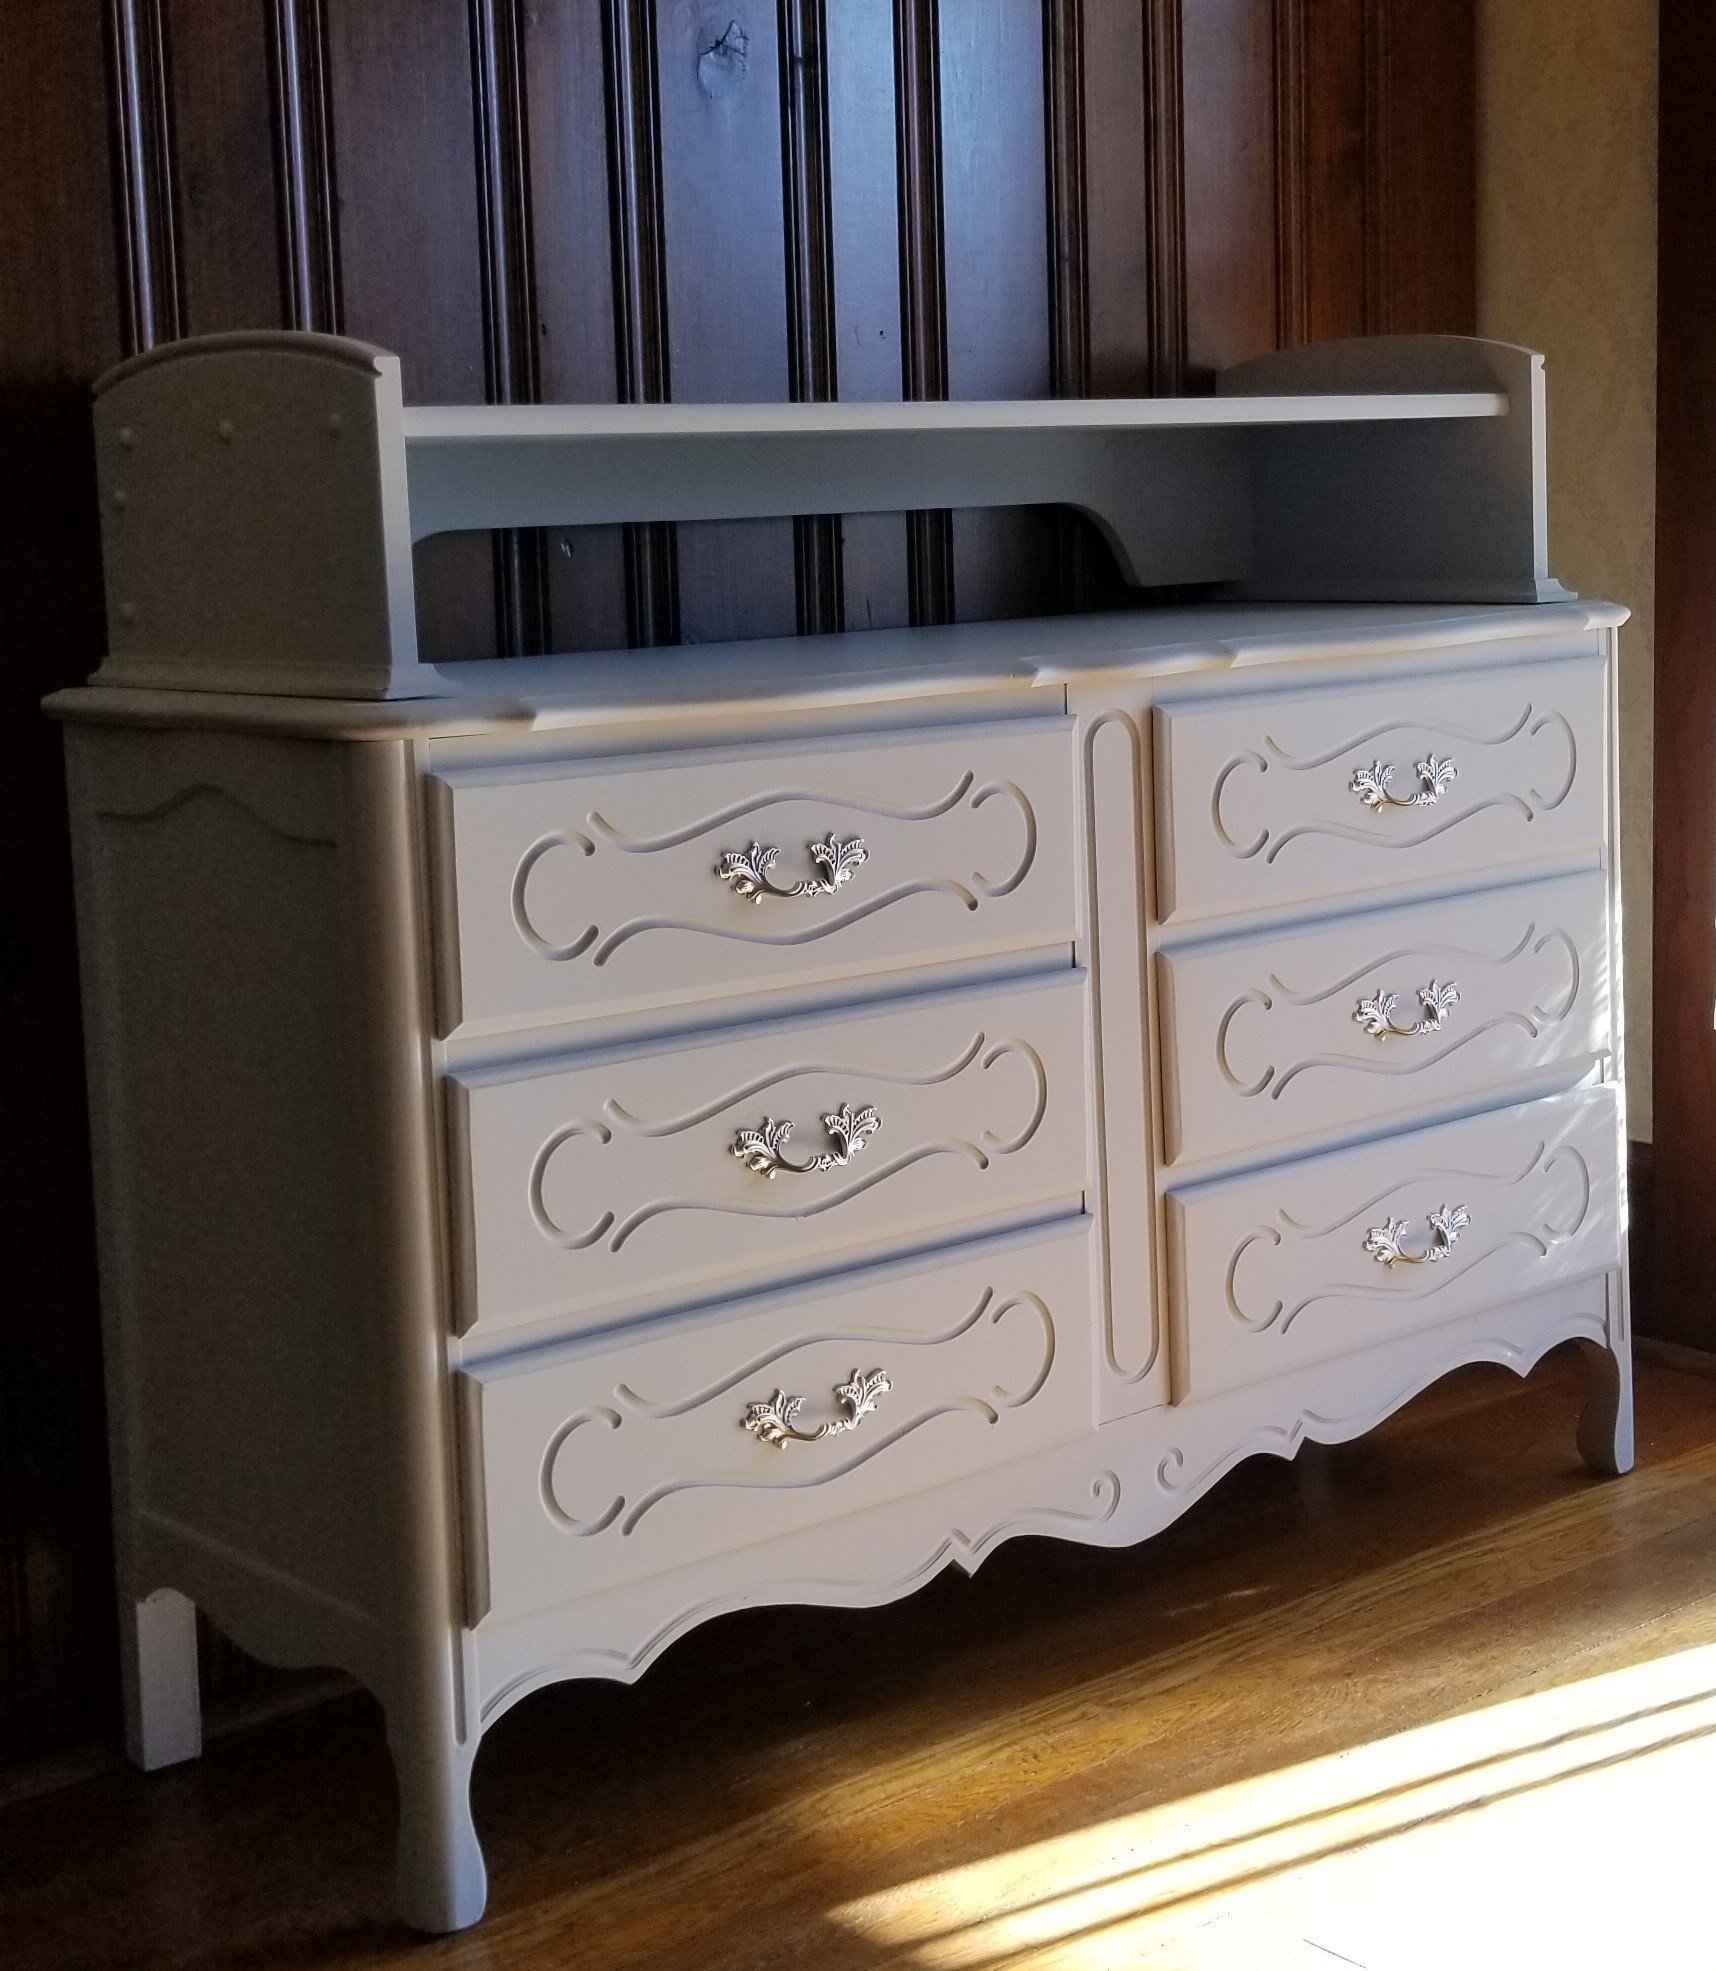
So, I trekked to Walmart in search of a more agreeable pink and discovered this terrific line of chalk-style paint in the craft section: Waverly Inspirations.  Not only do they have a terrific selection of colors, but they are totally affordable!  An eight ounce jar was under $6 and covered the entire mini-dresser with 2 coats of paint and I even had 1/3 of a jar left over!  Here’s the finished product:

20190228_145022.jpg

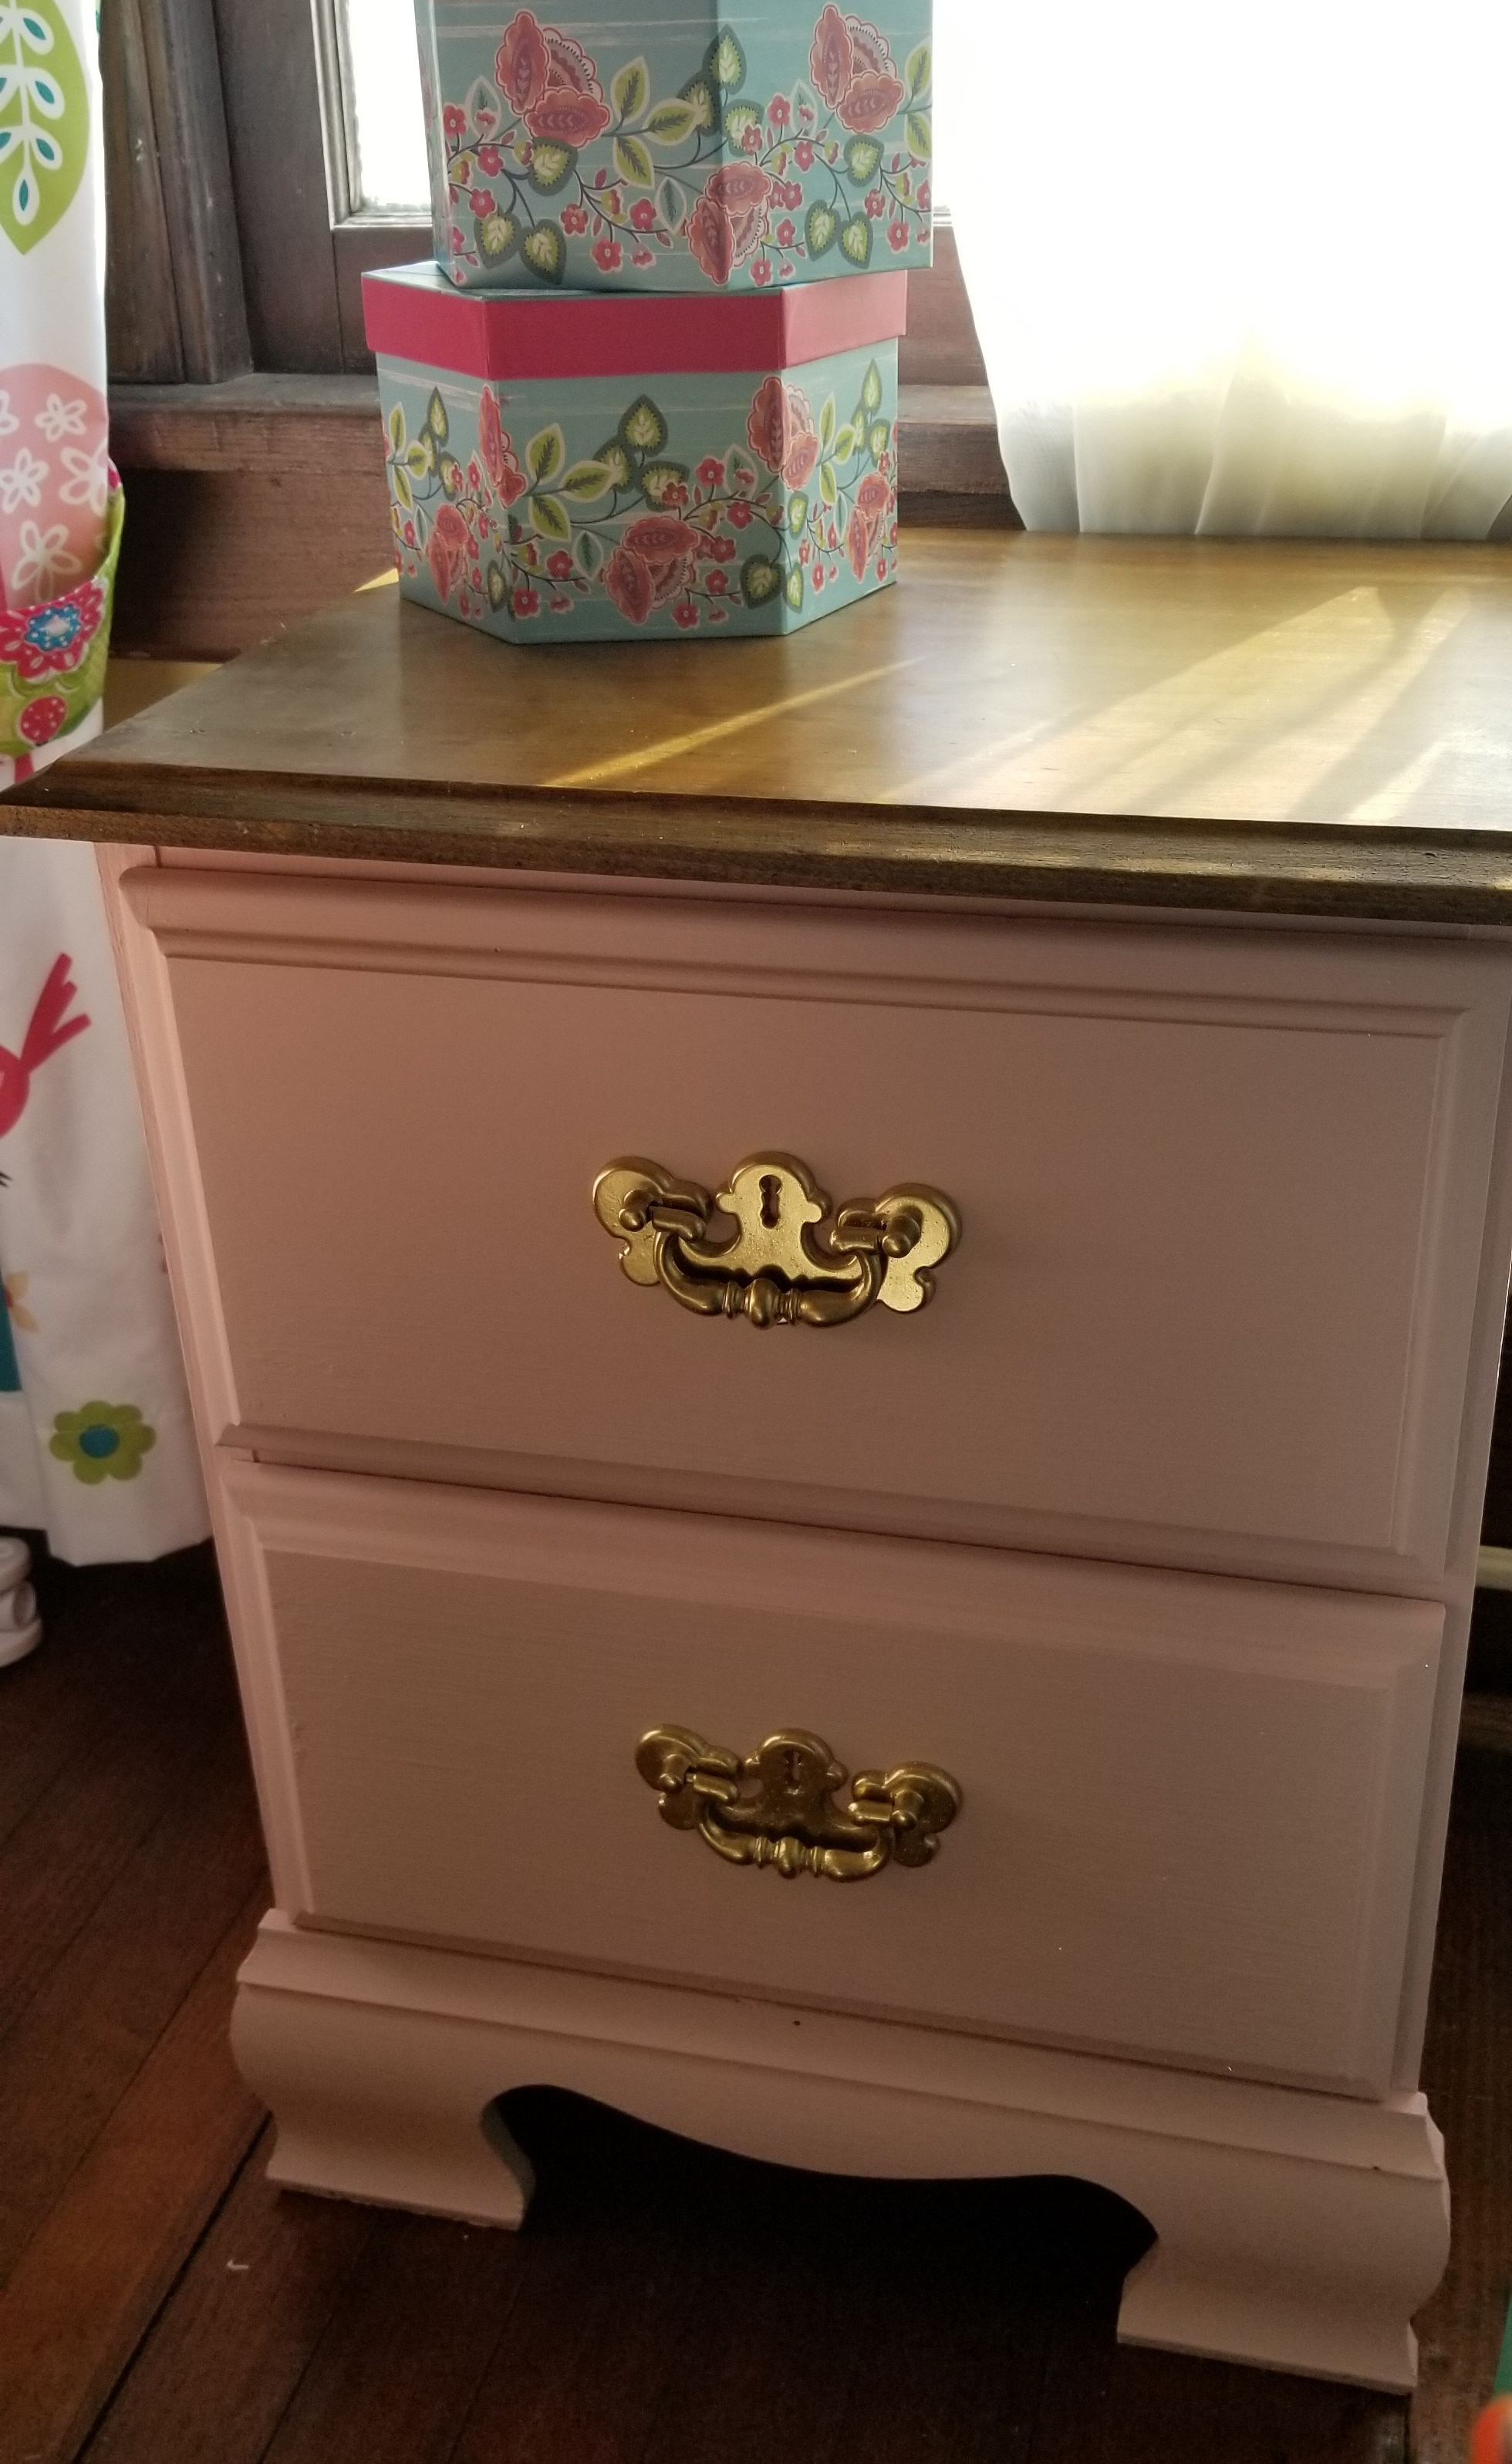
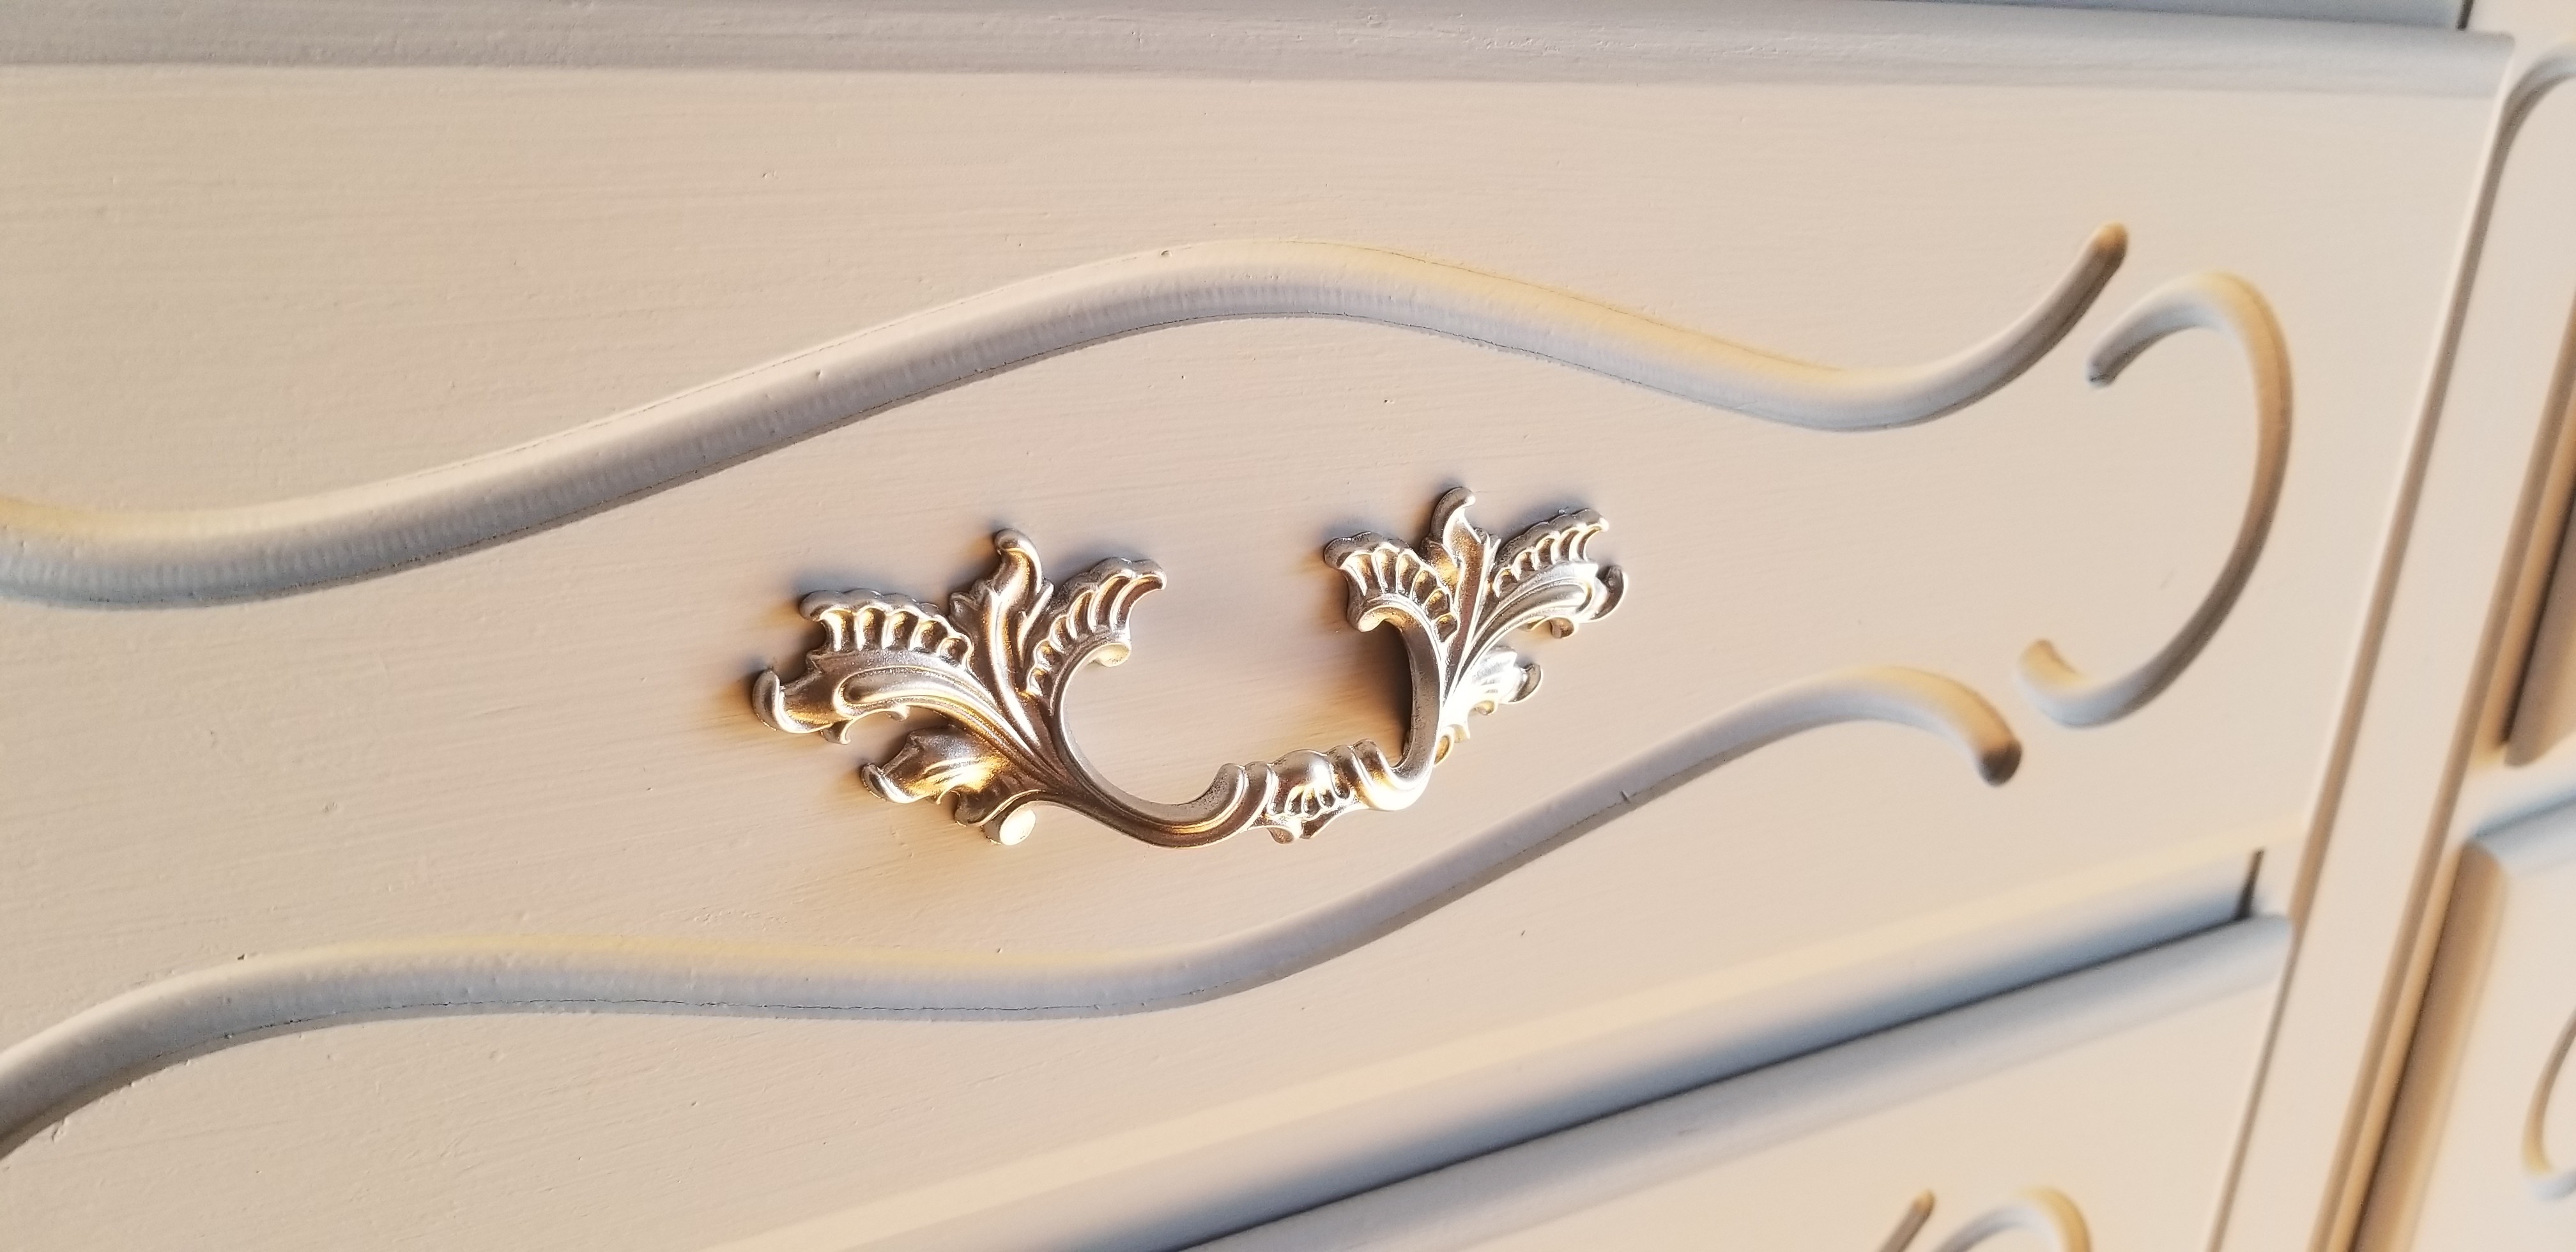
A soft, “ballet” pink that goes perfectly in the girls’ room!  The drawer pulls were scrubbed and spray painted with a bright metallic gold and I polished the top of the dresser’s wood with Daddy Van’s Beeswax Polish (seriously, if you have any wood in your house, you need Daddy Van’s in your life).  Not only does this beeswax polish make your wood look absolutely gorgeous, it also makes your house smell like a spa and there are no toxic chemicals in it, so when you’re done polishing, your hands and nails look great, too!  Just kidding… or not.

Next up, the countertop in my bar.  Here’s the before:

20190222_173453

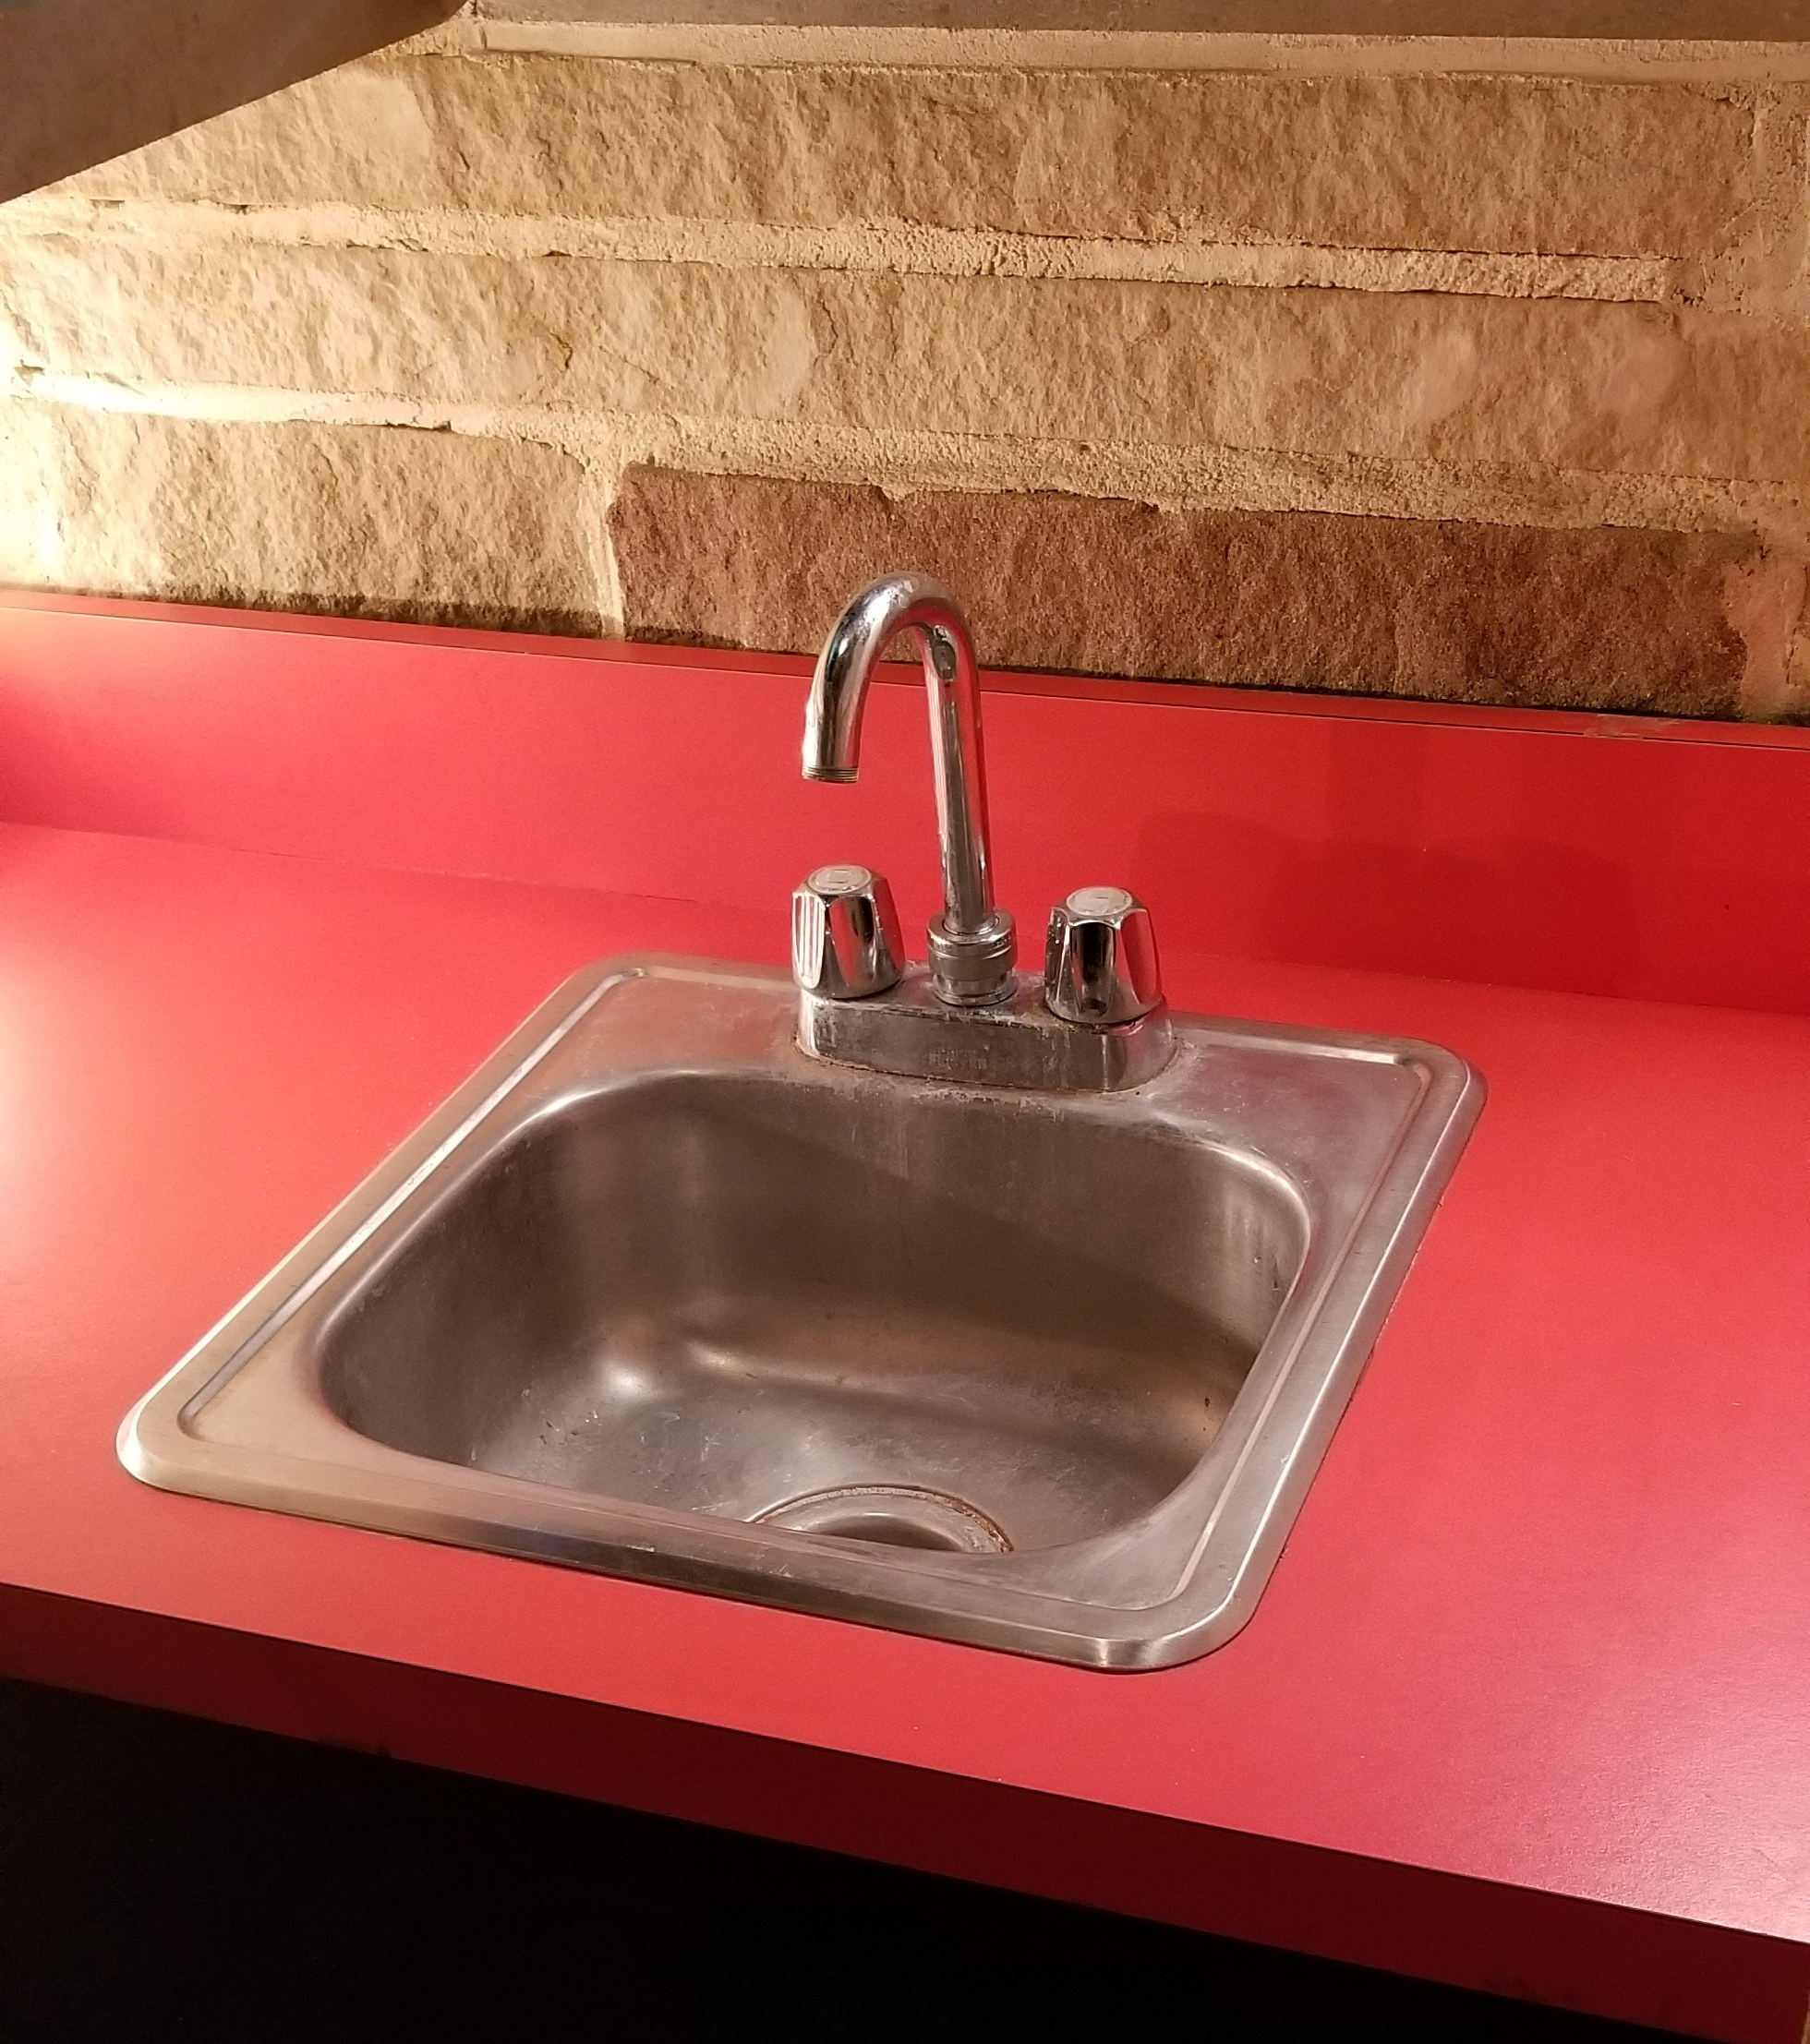
I know, I know… that bright red laminate countertop is so preciously 1972 and I should definitely keep it, BUT… I’m planning on painting the countertops in my kitchen this spring with black chalkboard paint, so I figured this would be a great place to test it out.

Once again, absolutely no prep with the exception of cleaning everything really well.  Then, 3 coats of black chalkboard paint later:

20190224_140002.jpg

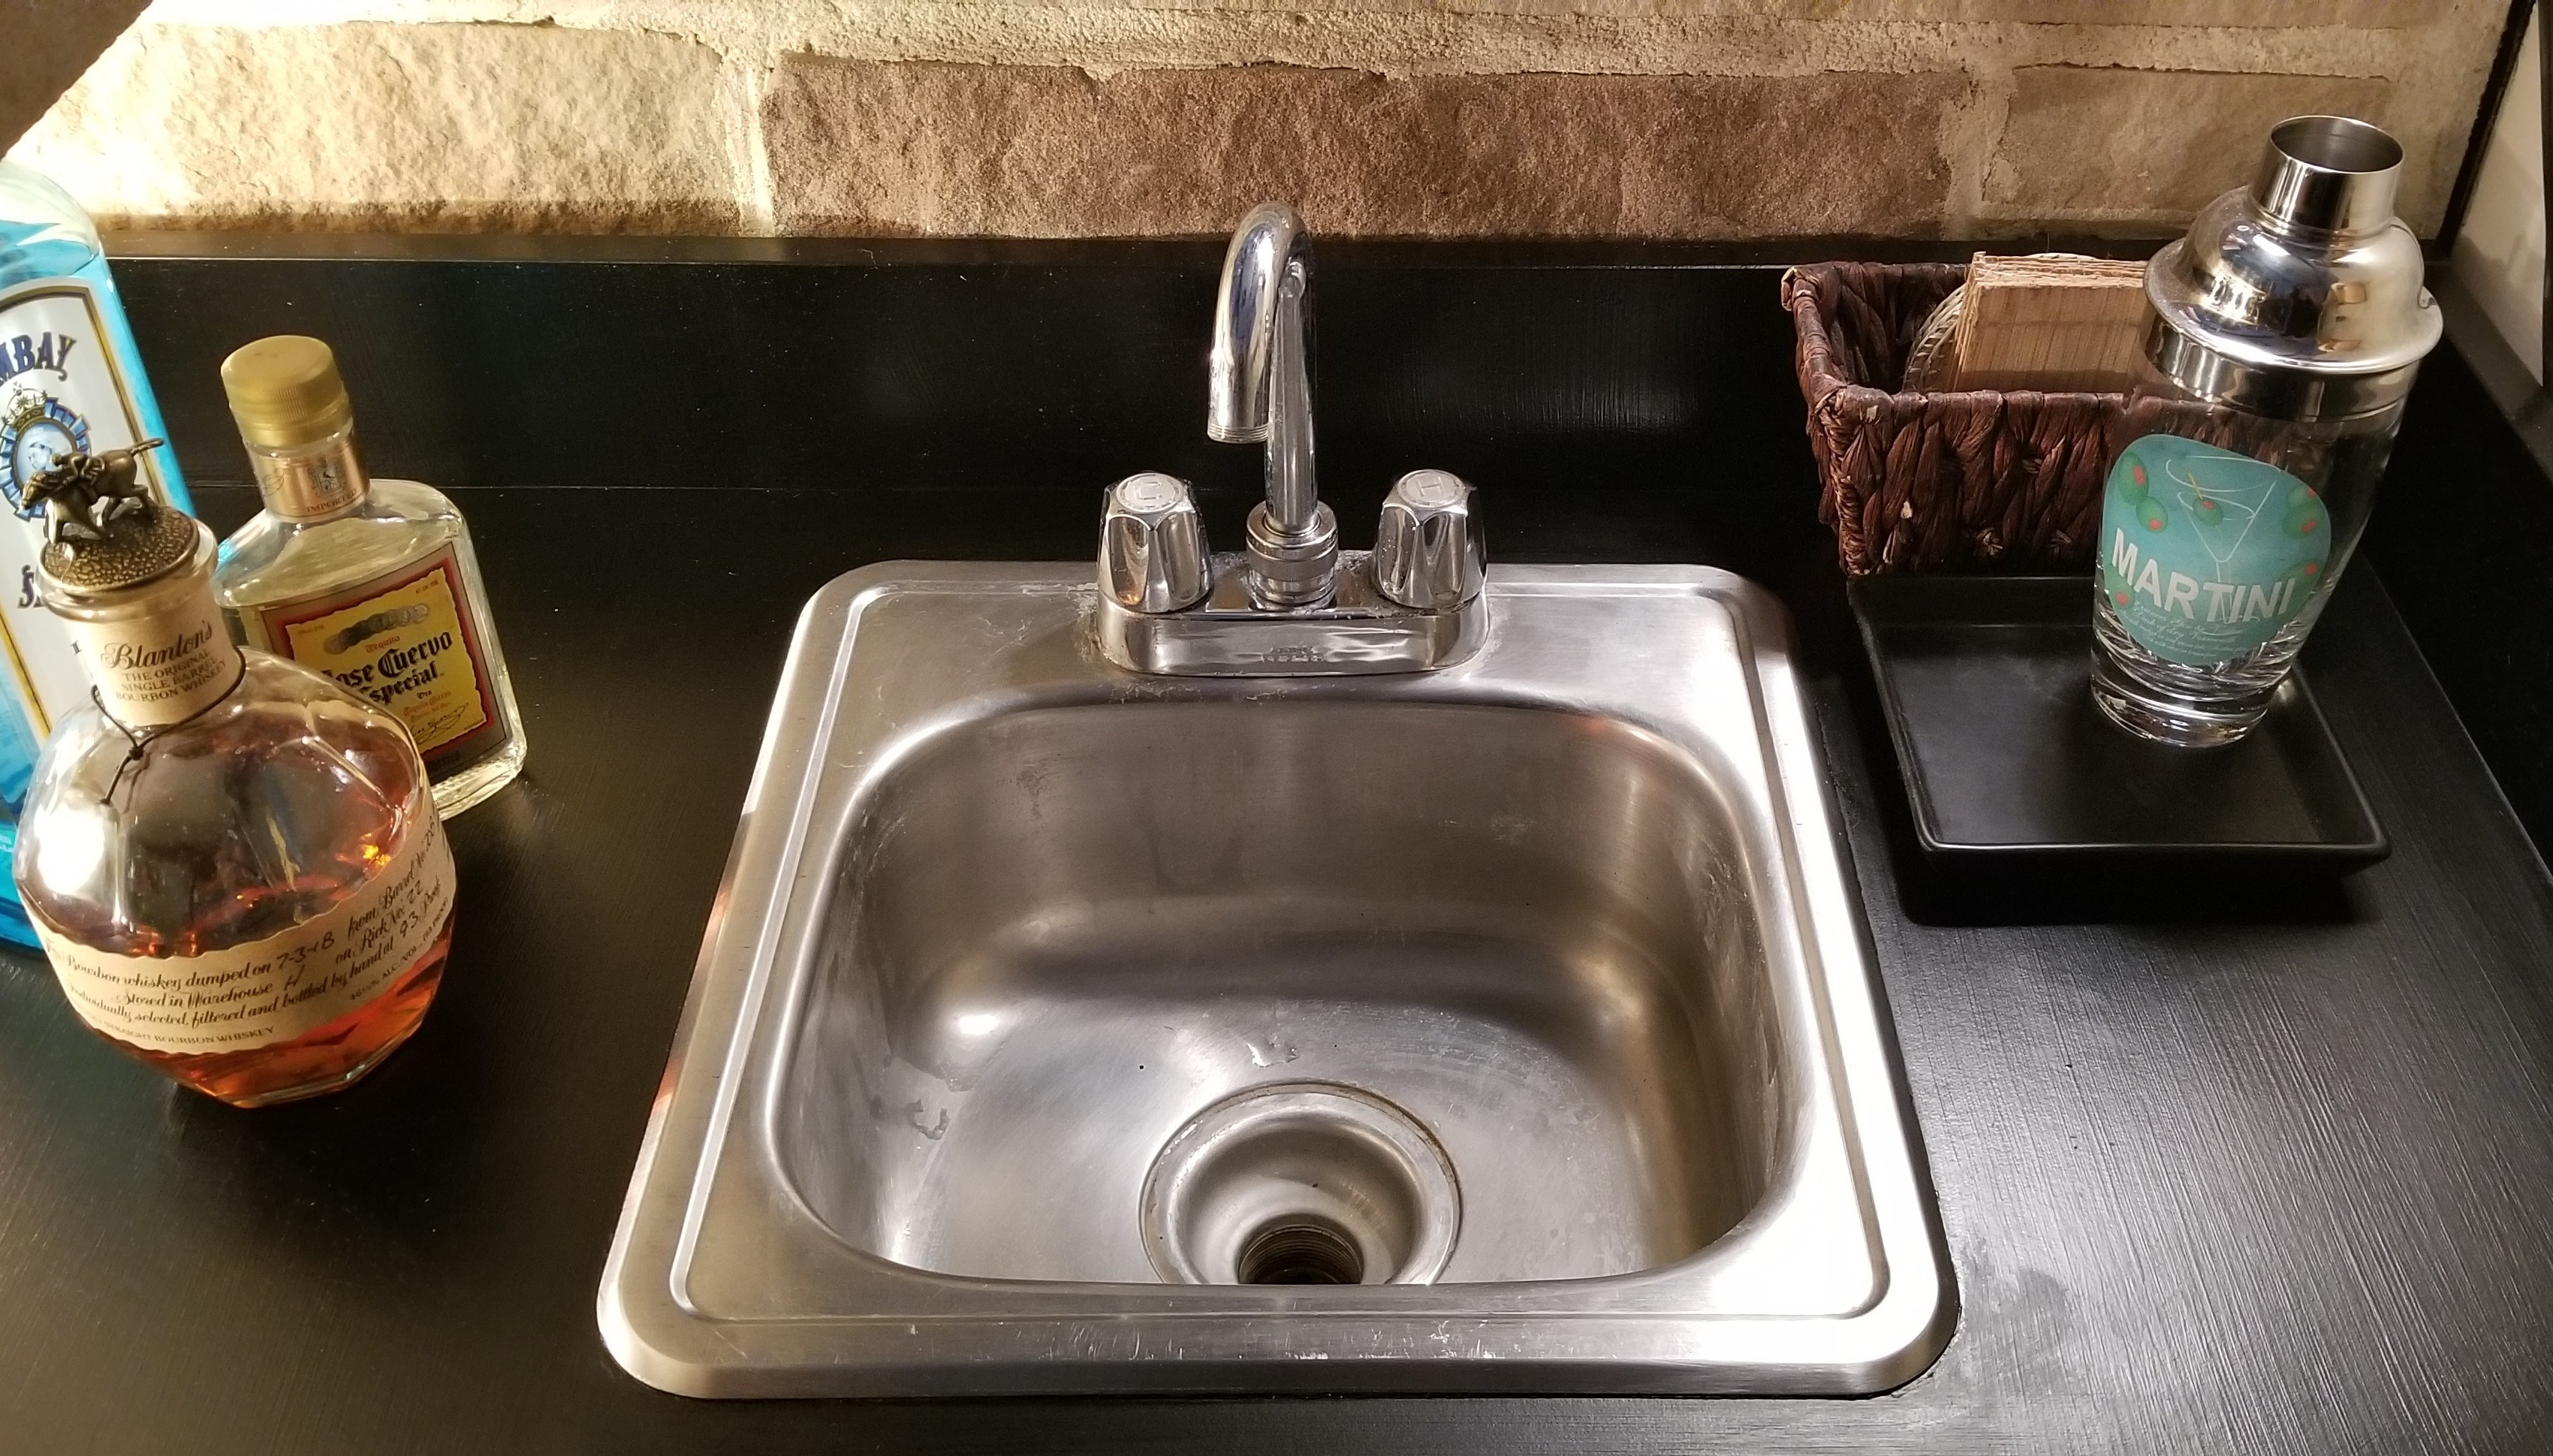
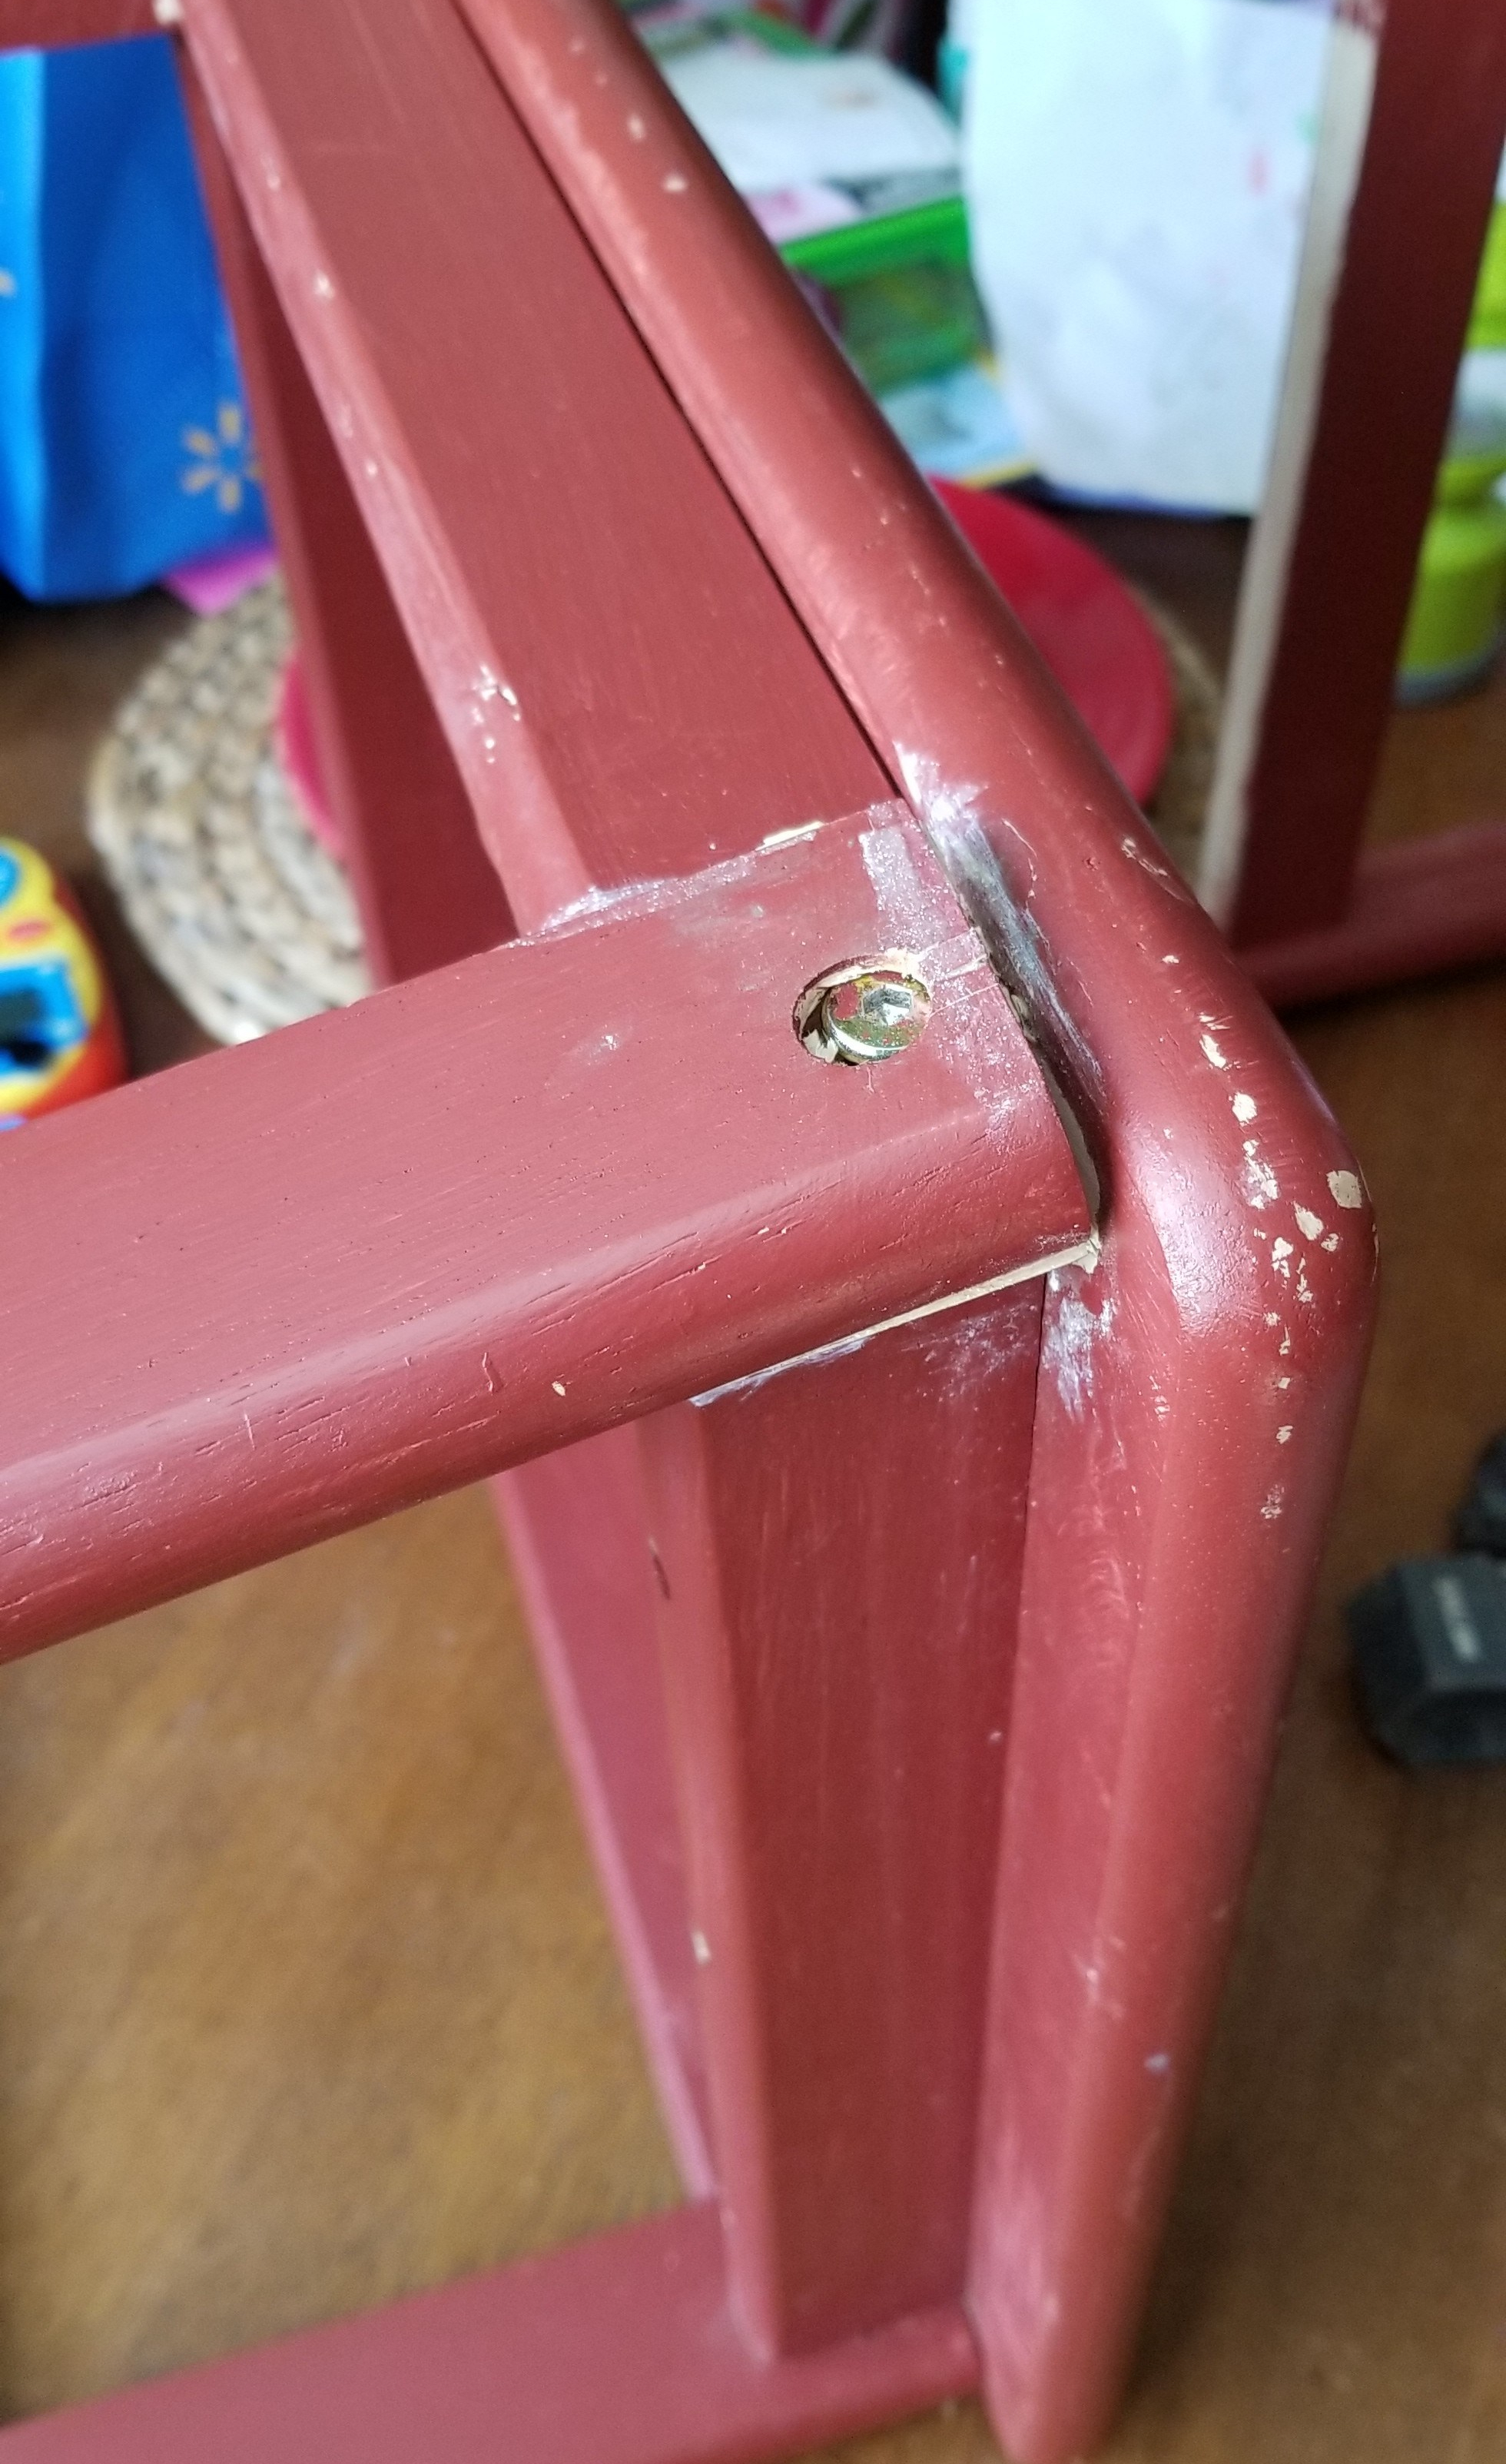
Seriously.  This makes me so happy.  It looks so elegant now – and even better in person.  On top of that, I actually did this project several weeks ago and I’ve been doing my best to beat this countertop up as much as possible… and as of today, not a scratch.  I did apply a thin rubbing of Daddy Van’s Beeswax Polish to see if it would add a sheen, which it did, but I also think it adds some protection, too.

Thanks to this little project (that only took 1 day – just waiting for coats of paint to dry) I’m confident to do this to my kitchen countertops now!

Last but not least, I wanted to test out the assertion that you can use chalk paint on glass with no prep.  So, I grabbed this glass candle holder from my overly-crowded basement (I was planning to donate this anyway)…

20190217_170516.jpg

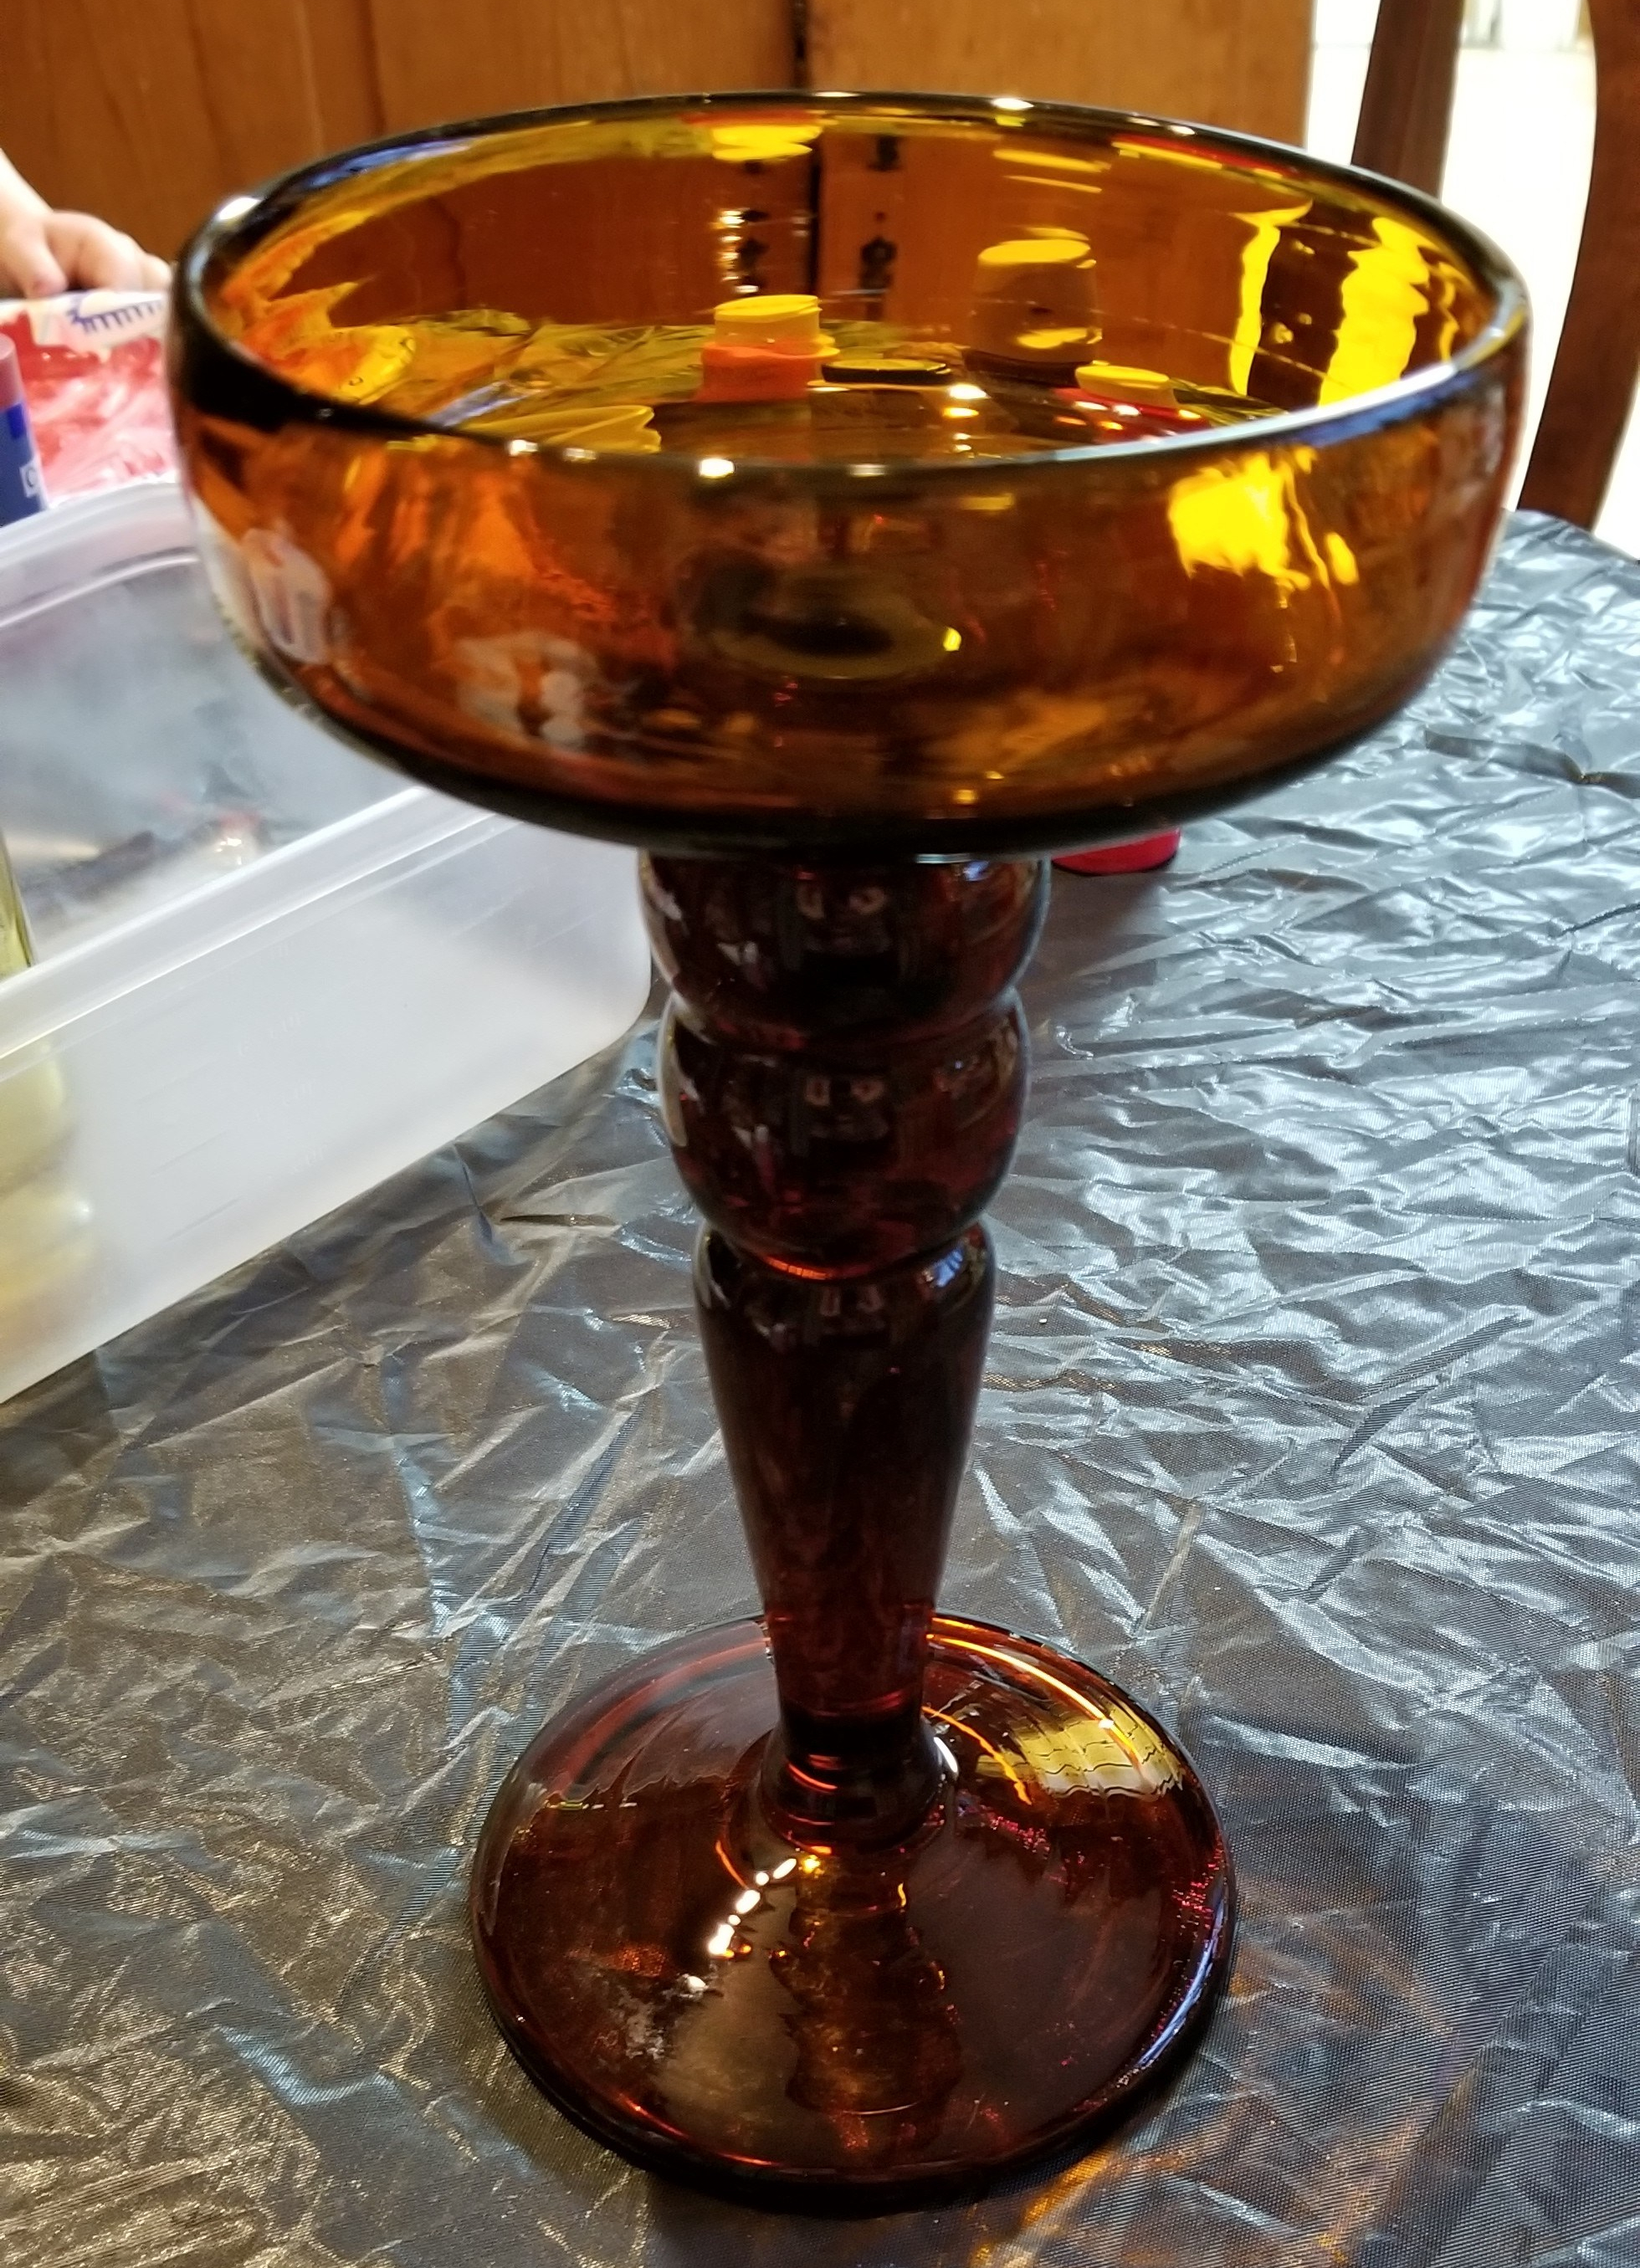
And I slapped 2 coats of the Kilz Chalk Style Paint in Platinum Ring (the same paint I used on my dresser project).  And guess what happened?

20190218_145047.jpg

I’m not donating the candle holder now.

So, that’s it for my adventures in chalk paint for now.  I picked up another “roadside find” last week and I’m planning on painting that bright teal, so stay tuned!

Kids Table in Chalk Paint (or “I May Have an Addiction”)

Guys.  I think I might have a problem.

Before

Before… A little kiddo-sized table and chairs in a dull shade of brick red. Found on the roadside!

After!

After! Two coats of Rustoleum’s Chalked Paint in Chiffon Cream. Bright and fresh and happy!

Two chalk paint projects in less than a week!  Am I forming an unhealthy pattern of furniture restoration here?  I’ve never done this many paint-related projects in this short of time…

I found this adorable kid size table and chairs on the roadside (no kidding) and it sat in my garage for over a year.  I pulled it out this past summer and put it in our homeschool space.  The girls enjoyed having a “new” table and chairs, but I did not enjoy the color.  After much discussion about what color it should be (“mommy, can it be hot pink with purple and teal dots?”) I managed to sell this color to the girls by calling it “Vanilla Chiffon Cream.”

One of the chairs had some significant damage that I had to repair first…

20190209_112050

Actually, this is what happens when mommy sits down on a chair she has no business sitting in.  We’ll file this under “ways to destroy your perceived body image and self-esteem.”

For this project, I used a different chalk-style paint:  Rustoleum’s Chalked in Chiffon Cream.  A note about this paint:  it was thicker and more difficult to apply than the other chalk paint I used last week.  I also ended up using about half the can, where last week I only used about one-fourth… and even though I achieved the “buttery” chalk-finish feel, this paint dried with a little rougher finish.

So the winner so far is the Kilz Chalk Style Decorative Paint!  Even though I really like the color of the Rustoleum (it’s a creamy white with yellow undertones), for practicality purposes the Kilz definitely comes out on top for being the easiest to apply, using the least amount of paint, and having the smoothest finish.

20190214_150126

And, my girls are quite pleased with their bright, updated homeschool work area.

The table and chairs update inspired me to clean out and reorganize our homeschool space and here are some views of that effort (I don’t have “before” pictures… I was on a roll and didn’t want to stop to take pictures of the overstuffed mess that existed before):

20190214_145930

Our little family “library” – as we affectionately call it – serves as our homeschool space for the time being. The bottom shelf of our bookcase is dedicated to homeschool supplies happily homed in hot pink containers. The rest is a mashup of all our other books, journals, magazines, cookbooks, odds, ends…

I’ll probably write a more detailed post about our homeschool space and how we use it, but for now, you see that brown Hepplewhite-style dresser in the corner?  Yeah, I’m eyeballing that for my next chalk-paint adventure.  Stay tuned and Happy Valentine’s Day!

Antique Dresser Revival

My love affair with chalk paint continues.

I have this antique dresser that I use by my front door to collect mail and it has been in serious need of a makeover. When my grandmother got a hold of it some 50 years ago, it was raw, unfinished wood. She put a coat of poly on it and called it a day. Over the years it has yellowed to a tangerine shade that has no business being in my house. When I inherited it about 7 years ago, I had no time on my hands to refinish it so we just used it as is.

20190203_144843

And that big white shelf thing on top? Well, that was just an improvisation from another piece of furniture I received from my sister in law.

20190203_144857

And, in case you didn’t notice, the hardware was…

20190203_144904

So, in light of the fact that I have zero time or tolerance for prep work and I just really needed a project to get my hands moving again, I chose chalk paint for this revival.

Why chalk style paint? Because it requires little to no prep, it’s pretty much foolproof, cleans up easily, has virtually no odor, and dries very fast. It also leaves a silky, smooth, buttery finish on whatever you slap it on.

Here were my tools, all purchased from my local Walmart:

Kilz Brand Chalk Style Paint in Platinum Ring, Mainstays Shower Liner, and a couple of super-cheap chip brushes. A note on paintbrushes: for some reason, chalk paint applies much better with cheaper brushes. Don’t ask me why. These brushes were 97 cents and $1.23 respectively. The shower liner was also under a dollar. The quart of paint was just under $20, but I only used about 1/4 of the can for the entire project, so I have plenty left over for more projects.

So, here we go! The process was super simple:

  1. Move dresser away from wall and wipe down.
  2. Put shower liner under dresser to protect the floor.
  3. Pull drawers out and set them aside.
  4. Remove hardware.
  5. Slap some paint on the dresser.
  6. Let dry.
  7. Repeat steps 5 and 6.

Seriously, I slopped the paint on, let it dry, slopped another coat on and was done. Start to finish took about 3 hours, but that includes some drying time and time to deal with the hardware. And I think it turned out pretty great…

20190204_140921

I also painted the white shelf thing because I knew I’d be using it and I wanted the whole piece to have a cohesive look. I can always take it off later.

And, as for the hardware, I tried cleaning it up but that didn’t work out as well as I’d hoped, so I opted to spray it with some “chrome” metallic paint I had hanging out in my basement.

20190204_140949

They didn’t turn out quite as “chromy” as I was thinking, but I really like the finish anyway. It’s almost like a soft, brushed chrome.

That’s going to be a thing now. Soft Chrome. You heard it here first!

And so, the moral of the story is: chalk paint is fantastic. I didn’t sand or prep anything. All the nicks and scratches are virtually gone and the finish is buttery soft. This lovely shade of gray has a blue undertone and works really well with the other sand and blue tones in the room.

Here it is all prettied up:

20190204_210419.jpg

I’ll definitely be chalk-painting again!

Winter Decorating

‘Tis the season for taking down the holiday decorations, right?  Unless, you’re like me and enjoy embracing the icy hues of winter.  After all, it can be a dark, dreary time of year, and sometimes taking down the decorations just makes it all the more depressing… but that doesn’t have to be the case inside of your home.  Here are a few examples of easy, bright, wintry decorating ideas from my own home that can easily stay up until St. Patrick’s Day!

20190113_202103

20190113_202214.jpg

20190113_202230

White lights intertwine with sparkly white garland in the window, while ornaments perch in and around some sedum I saved in a terra cotta pot from this summer.  Icy shades of silver, white, and teal are perfectly suited for wintertime and don’t necessarily scream “Christmas.”  The wreath hangs in the window all year and I just change out the accessories on it.

Here is a daytime view of the same window.  My family room has a “beachy” theme and these colors work well even through the holidays.

20190105_130636.jpg

In the living room, a giant Chinese dough bowl holds an assortment of wintry picks, ornaments, and my absolute favorite: a large glittered pinecone.  This year, my goal was to decorate without any red, so the transition from Christmas decorations to Winter decorations that could stay up after the holidays would be easy.

20190108_153843

20190108_153939

Some views in the daylight:

20190110_144213.jpg

As you can see, the dough bowl is very large, but to achieve the same look you don’t need the exact same thing.  Instead, you could use an elongated basket, wooden box, or ceramic planter.

20190110_144119

I really love this pinecone.

20190110_144056.jpg

Happy Winter!

What To Do When You Have Nowhere To Put Your Baby

Gallery

This gallery contains 20 photos.

Like most first-time moms, when I discovered I was pregnant, one of the gazillion things that crossed my mind was one of the more superfluous and giddy:  “Ooh!  I get to set up and decorate a nursery!”  Except, there was … Continue reading

Valentine’s Miscellany

I love Valentine’s Day.  I used to hate it.  But now I love Valentine’s Day for a reason that you might not expect.  I love the colors.

The red-pink-white combo is delicious to me.  I want to eat it and decorate with it and wear it and make things with it.


And yes, I know how “girly” this post is, and how completely unnecessary it is for me to discuss Valentine’s Day colors, but look how pretty…

And no, I haven’t gone all hog wild and decorated my whole house in red, pink, and white hearts and flowers.

I’m too exhausted from the gratuitous Christmas decorating I do every year that takes me a week to put up, and 3 days to take down.  By the time Valentine’s Day rolls around, I barely get a heart-shaped wreath on my front door.


Not my front door. But this is pretty, no?

I think that the colors of Valentine’s Day remind me of warmer, sunnier, more colorful days – and remind me of hope.

The hope we have in warmer, sunnier days coming in Spring and the hope of the Lord -who will show us again this Spring that He has overcome death – and brings an eternal love for all of us – when we celebrate Easter.


It’s a pretty good holiday when you think of it that way.